


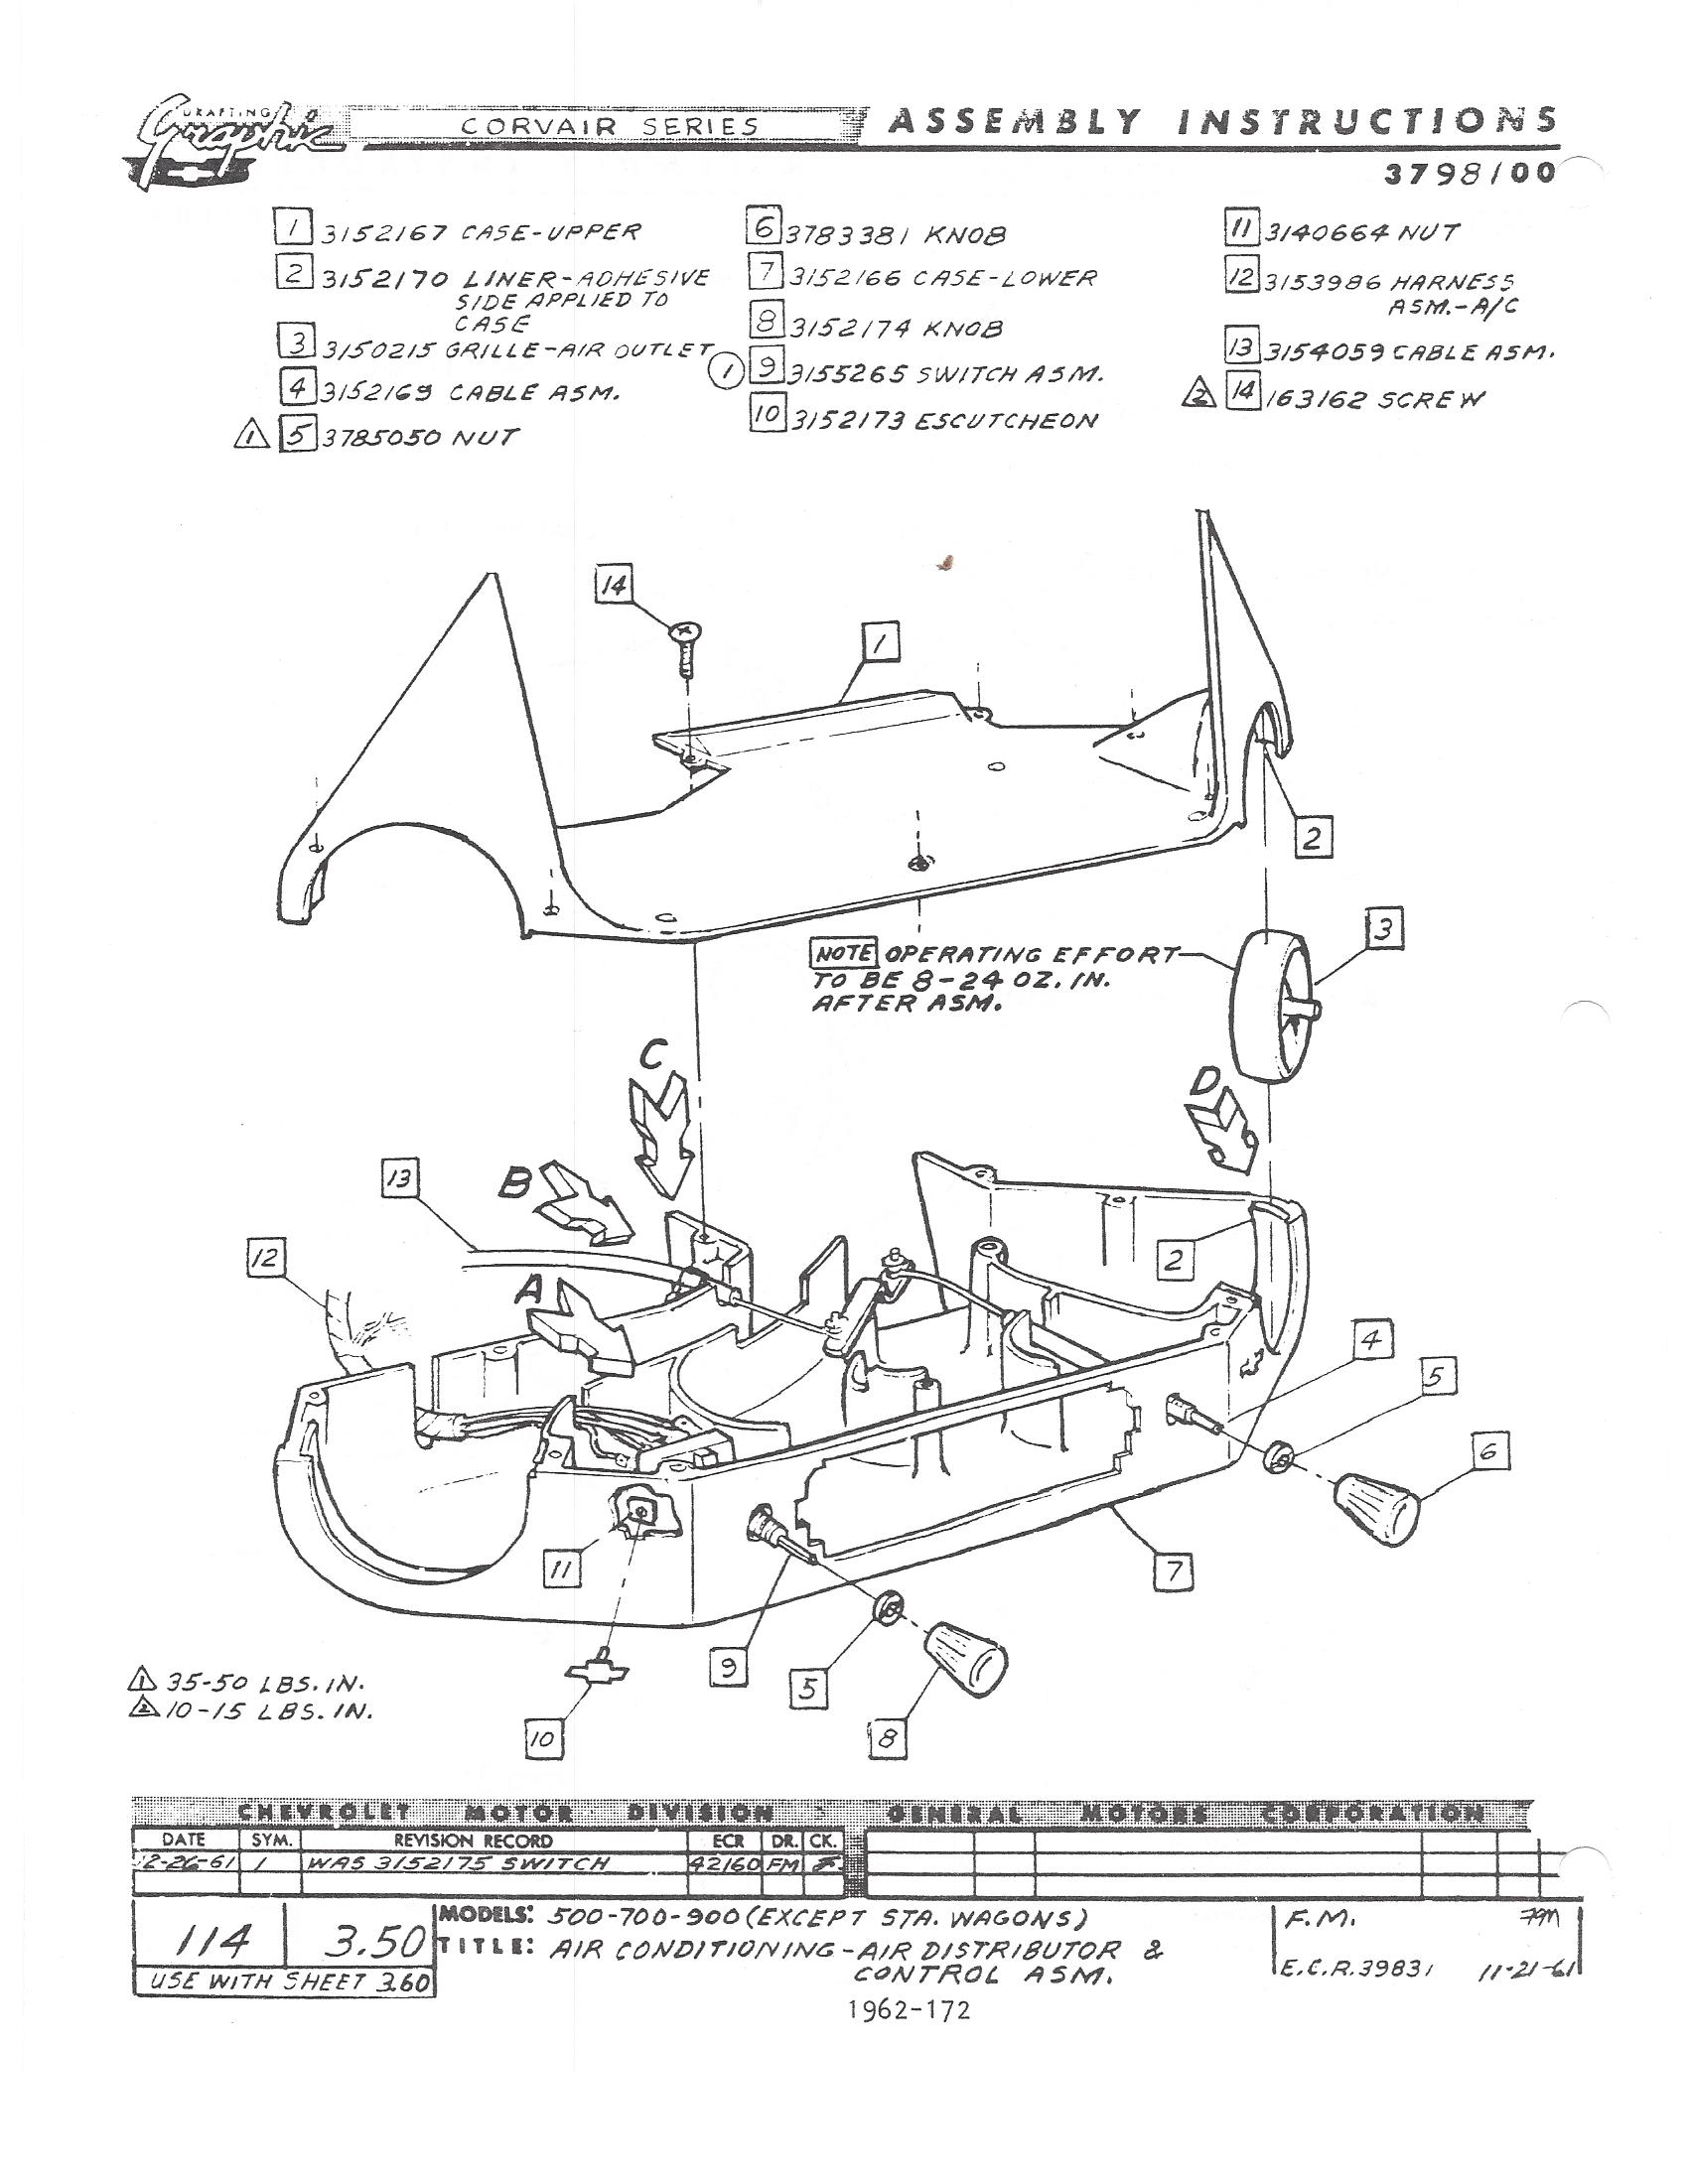
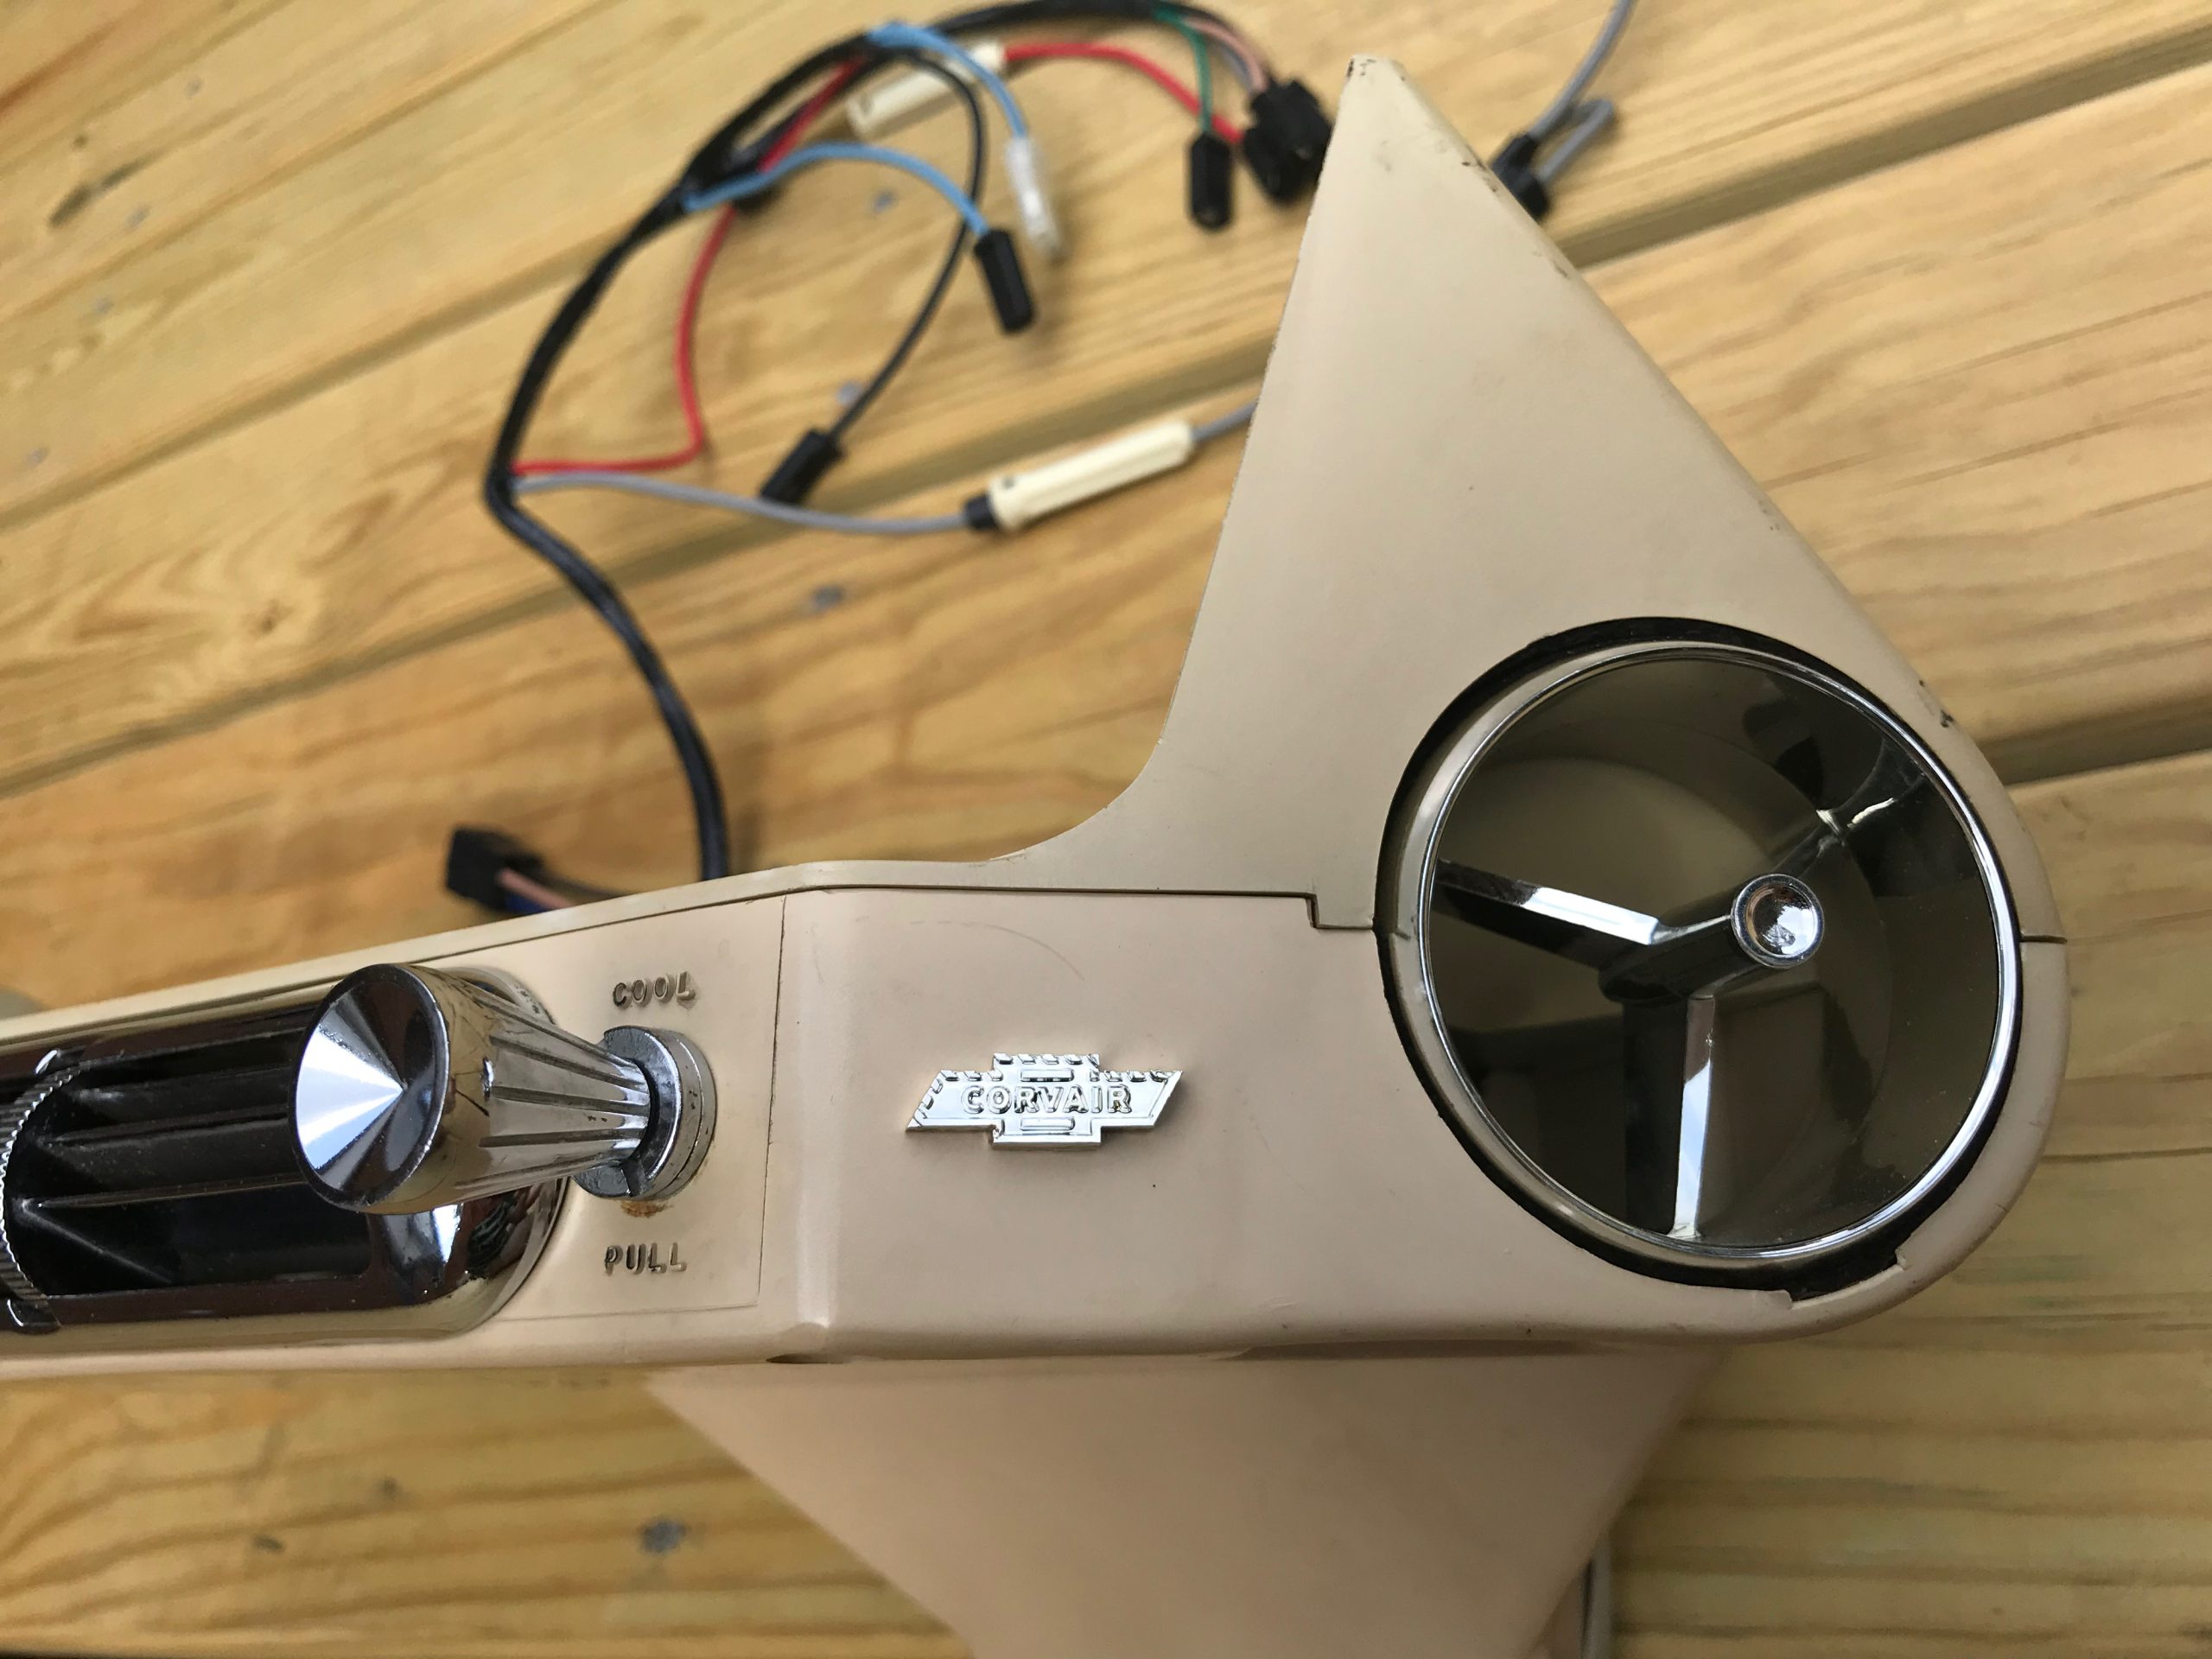
This article shows how I reconditioned the Air Distributor/Control pod for my 1964 Air Conditioned Convertible (the Glenn Corvair). This is the part of the AC system that is mounted under the radio housings, containing the air vents and the control knobs. For simplicity, I’ll refer to it as the control pod.
The control pod consists of the following parts and materials:
- Case – (upper and lower half) made of plastic, originally light grey color, tends to yellow with age
- Side Vent balls (2) – chromed plastic
- Center Vent – chromed metal
- Chevy Bowtie Emblems (2) – chromed black plastic
- Control Knobs – chromed metal
- Control cable (1961-63 2 piece cable with internal pivot; 1964 one piece cable with no pivot)
- Wiring harness
- Control Switch
- Inlet Seal

The following table shows the original GM part numbers for each part, each year:
| Description | Part Number | |||
| 1961 | 1962 | 1963 | 1964 | |
| Case, Upper | 3152167 | 3154526 | ||
| Case, Lower | 3152166 | 3154277 | 3837975 | |
| Screw for case (7) | 163162 | |||
| Liner, side vents (felt, 4) | 3152170 | 3855561 | ||
| Grille (side vent balls, 2) | 3150215 | 3000234 | ||
| Deflector Assembly (center) | 3781360 | |||
| Knob, temp Control | 3783381 | |||
| Knob, Blower Control | 3152174 | |||
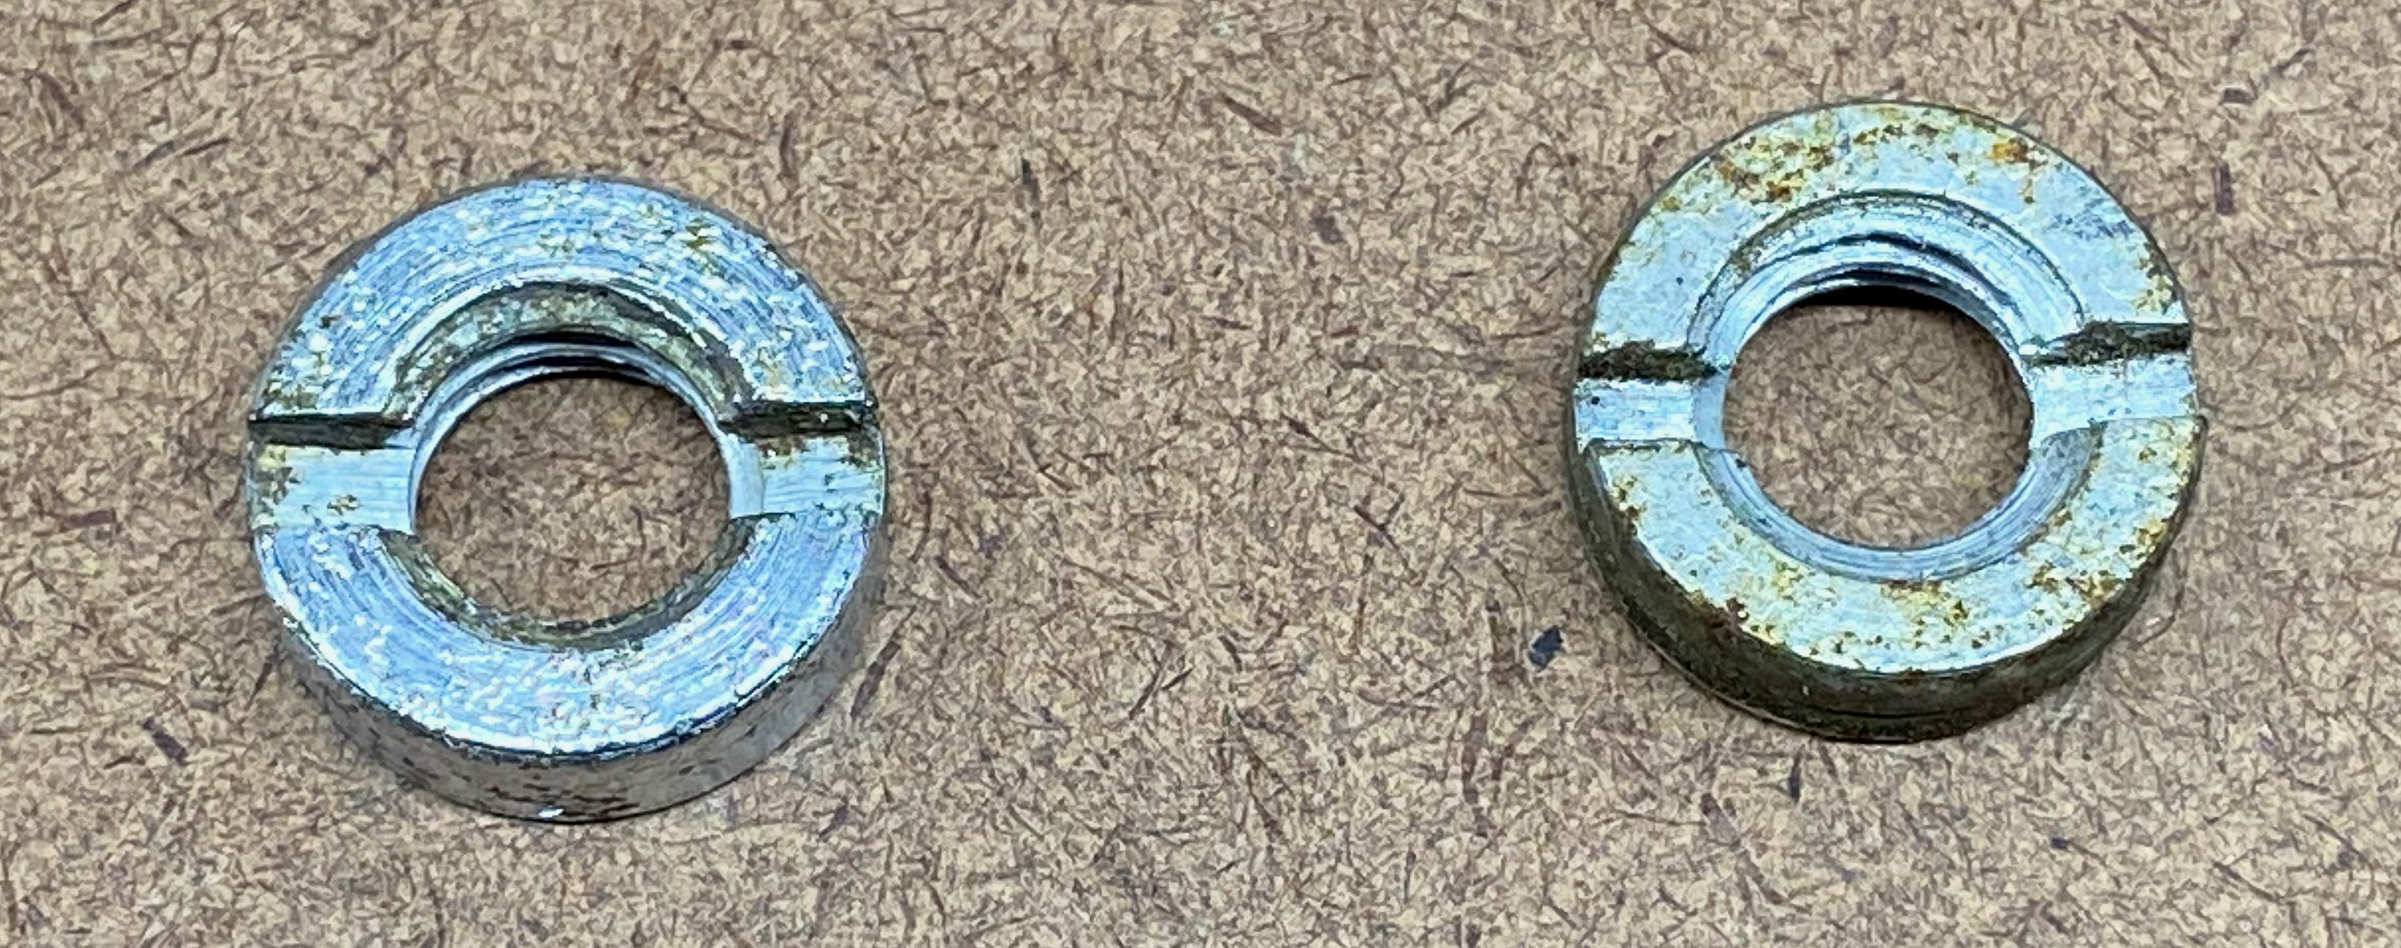
| Nut (for control shafts, 2) | 3785050 | |||
| Escutcheon (Chevy bow-tie, 2) | 3152175 | |||
| Nut (clip for bow-tie, 2) | 3140664 | 3154411 | ||
| Switch Asembly | 3152175 | 3155265 | ||
| Wiring Harness | 3153986 | 3154275 | ||
| Seal, inlet (rubber) | 3152187 | 3154457 | ||
| Staples, inlet seal (8) | 468066 | |||
| Cable Assembly, front | 3152169 | n/a | ||
| Lever, Pivot | 3152205 | 3154527 | n/a | |
| Screw, pivot | 187875 | n/a | ||
| Clamp, pivot | 3134193 | n/a | ||
| Cable Nut (2) | 3140664 | 3126659 | n/a | |
| Cable Assembly, rear | 3154059 | n/a | ||
| Screw, rear cable | 187875 | n/a | ||
| Clamp, rear cable | 3134193 | n/a | ||
| Cable Asembly (one piece) | n/a | 3837976 | ||
Begin restoration by disassembling the case.
- Carefully pry open and remove the (8) staples securing the inlet seal to the case. Be careful not to damage the seal as there are no readily available replacements.
- Gently remove the inlet seal
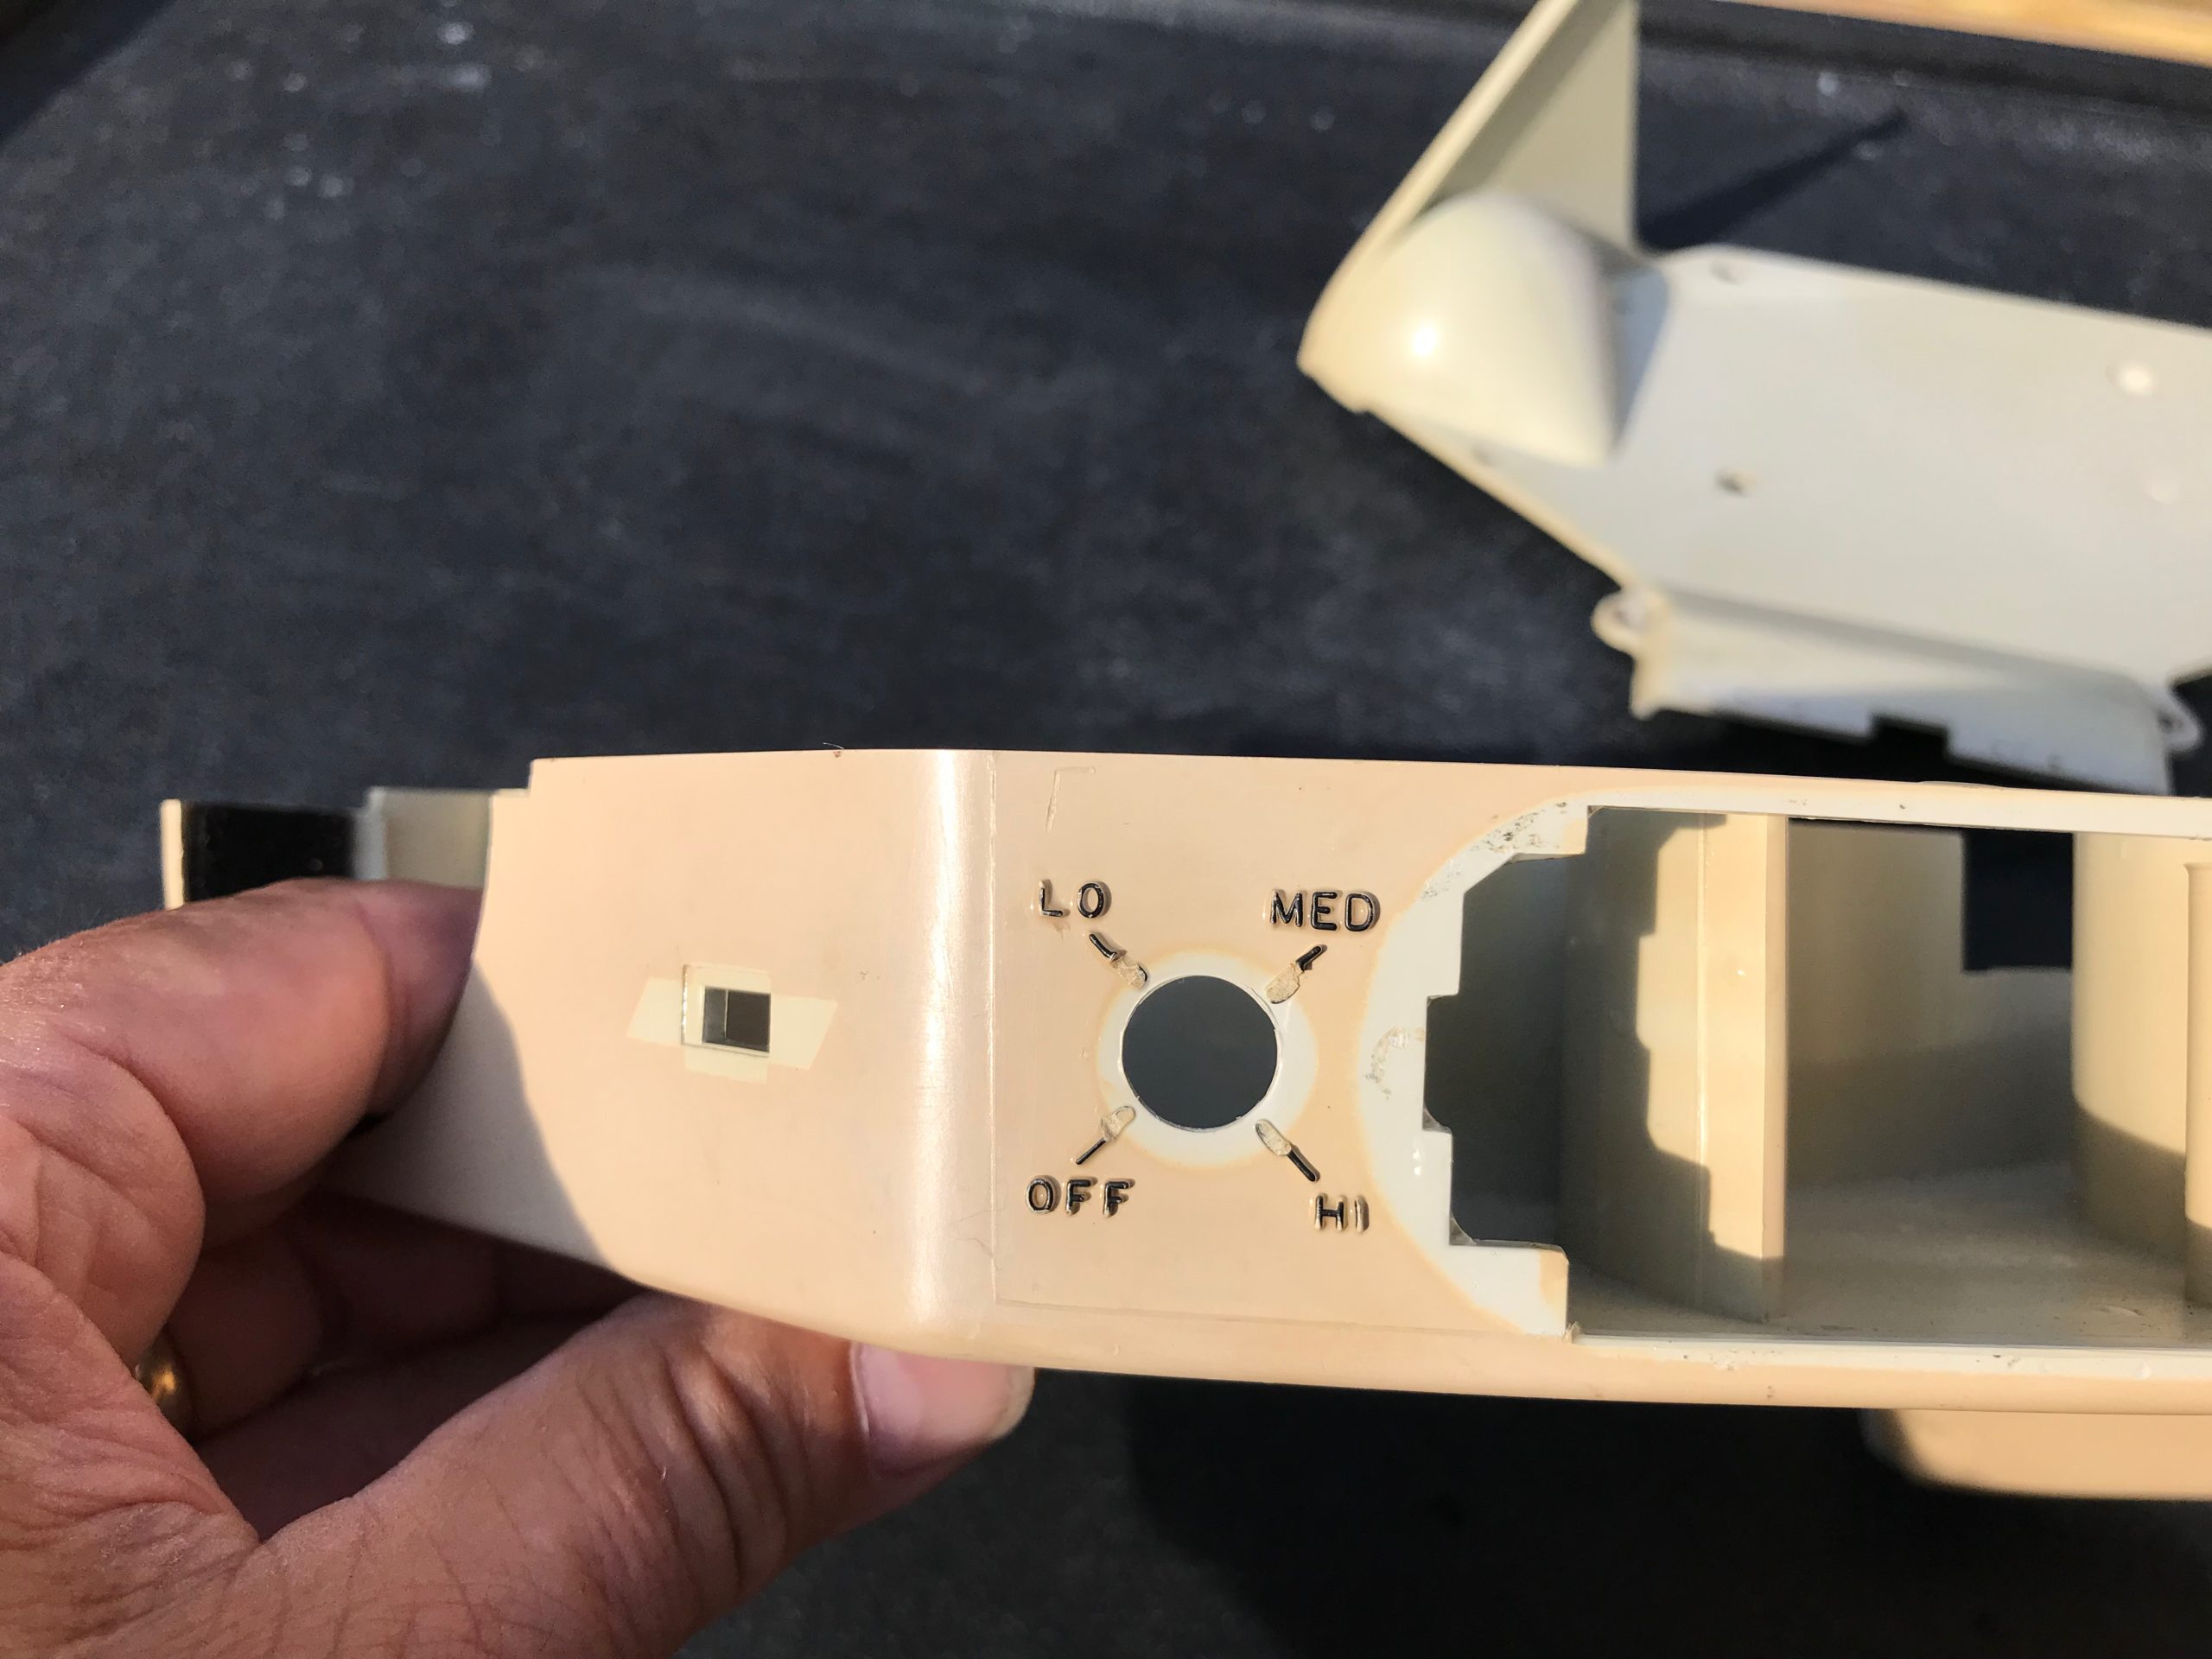
- Remove the left control (blower) knob by pulling on it
- Remove the right control (temperature) knob by unscrewing it counterclockwise
- Remove the two control rod shaft nuts. Russell Davis makes a tool for headlight and wiper switch nuts that works on these nuts as well; otherwise, gently tap them loose using a small screwdriver in the slots.
- Remove the (7) case screws (from top of unit)
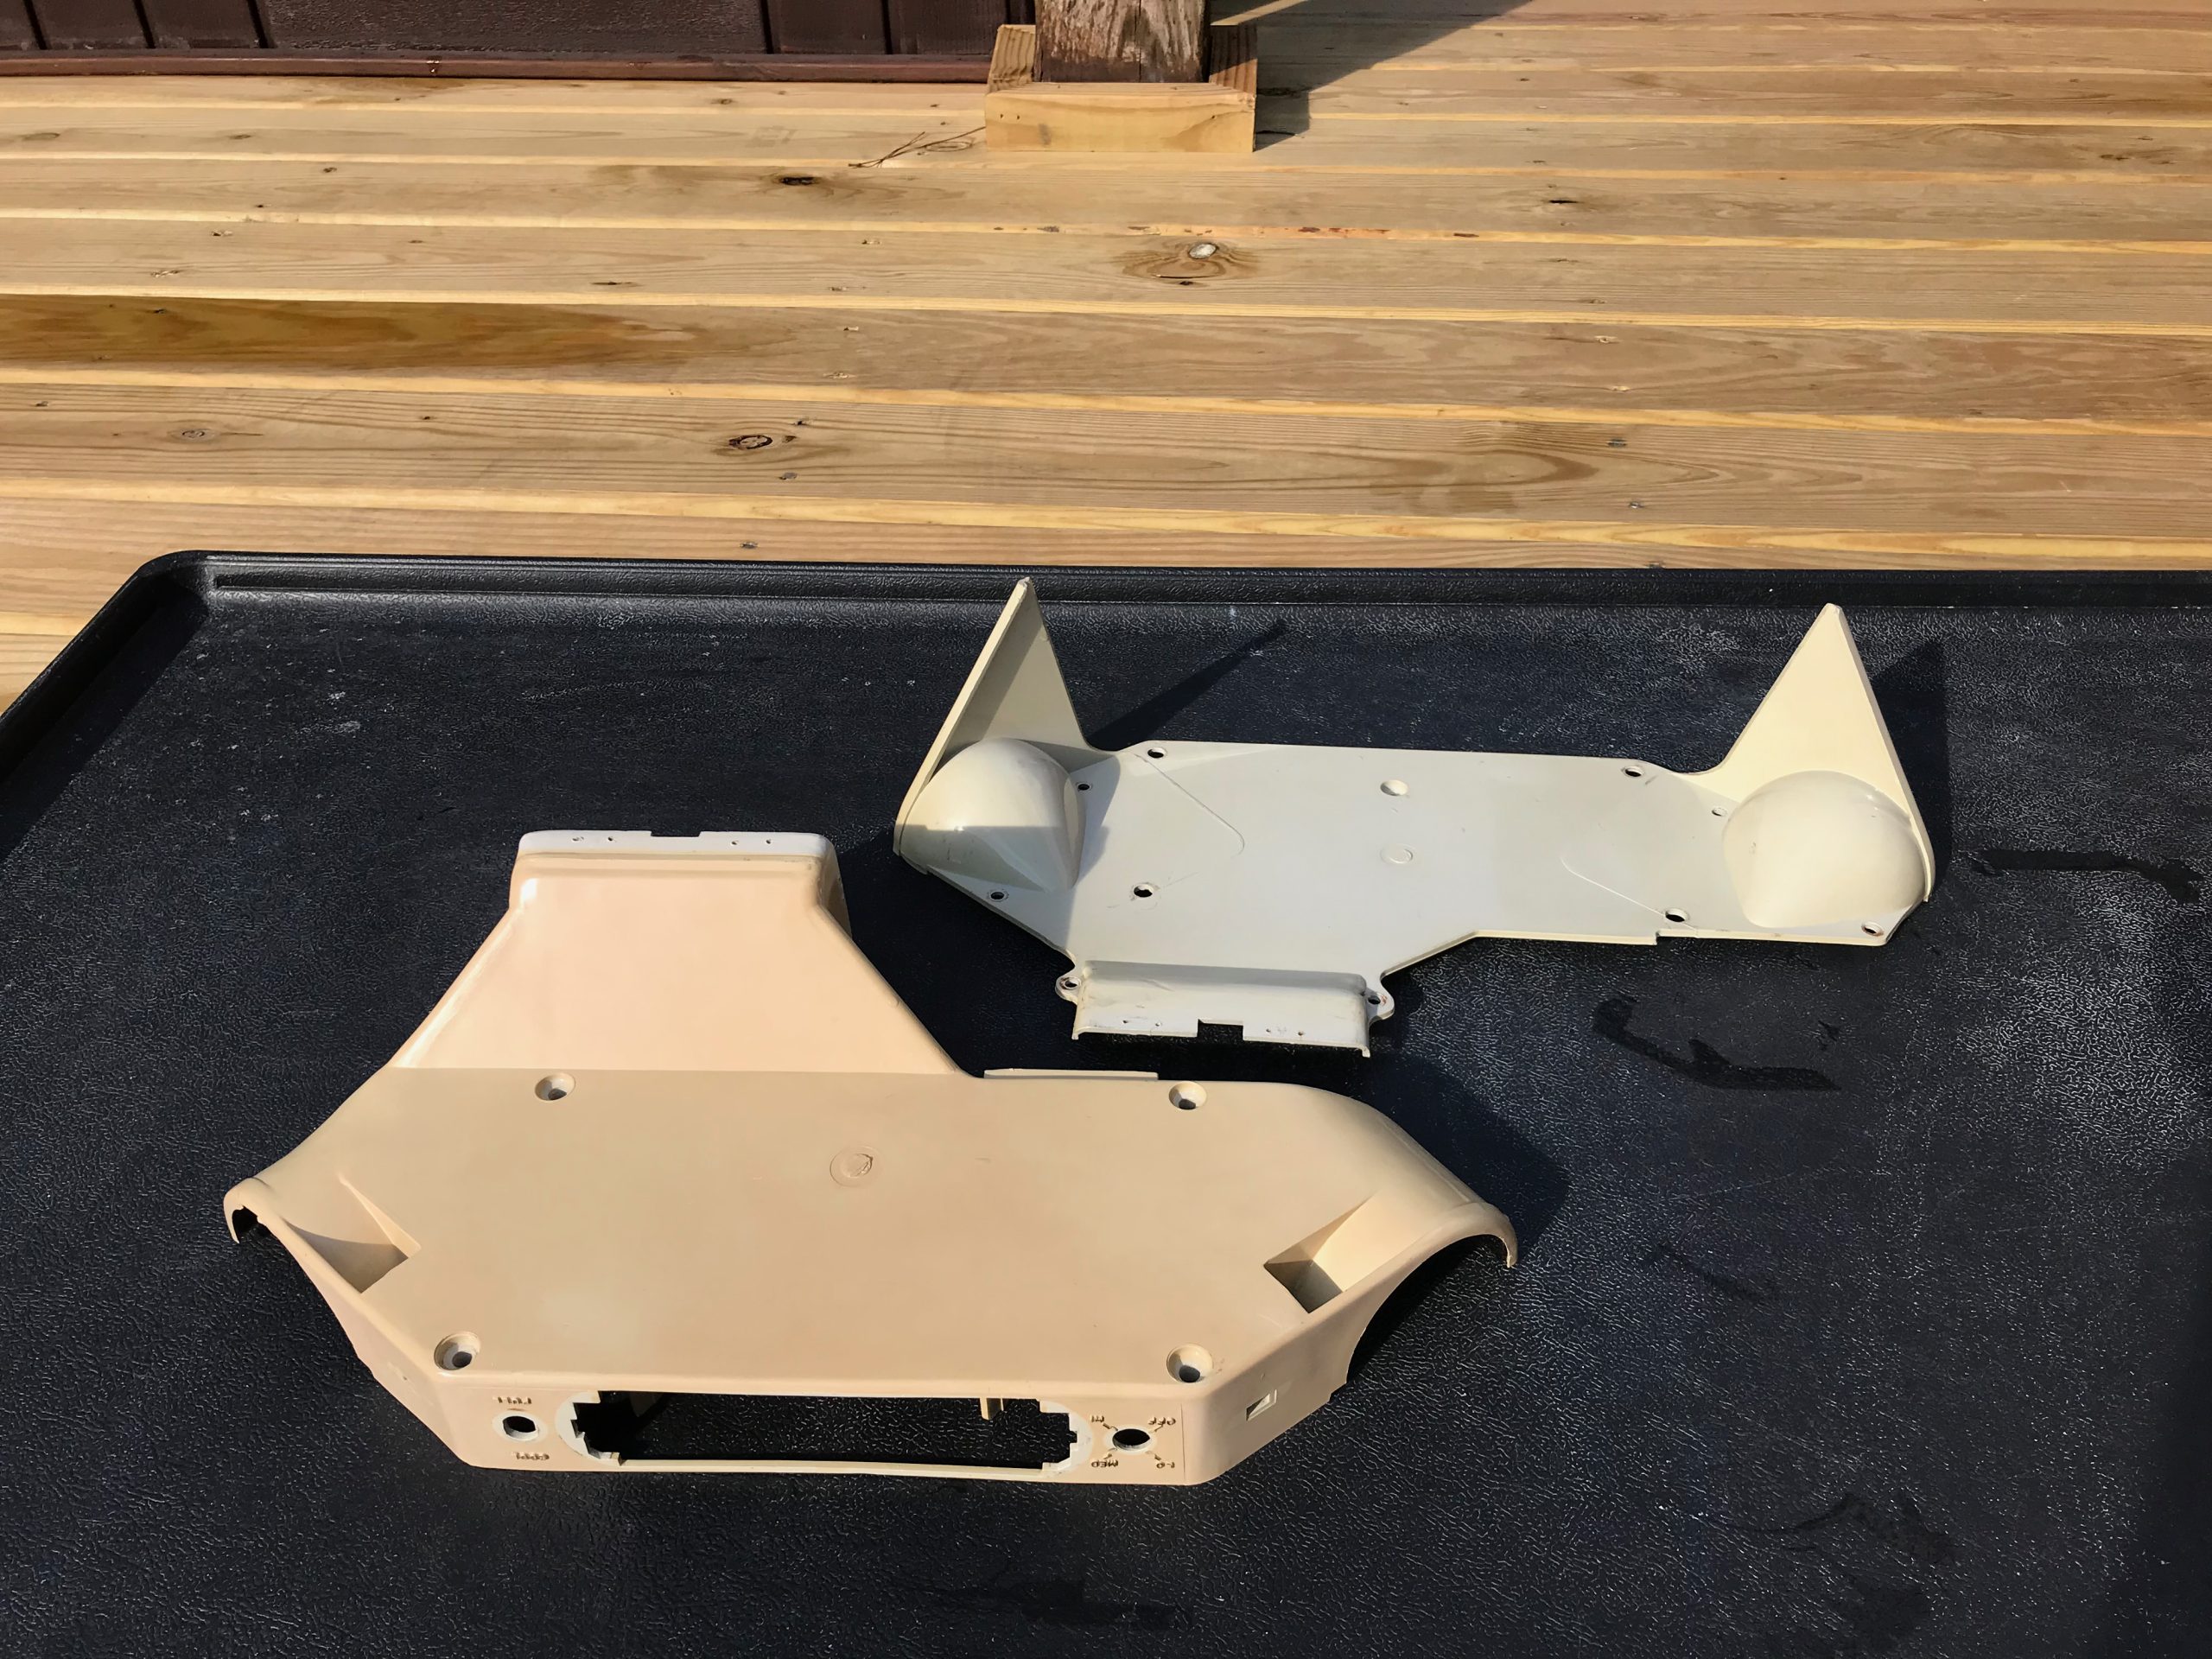
- Carefully separate the upper and lower case halves
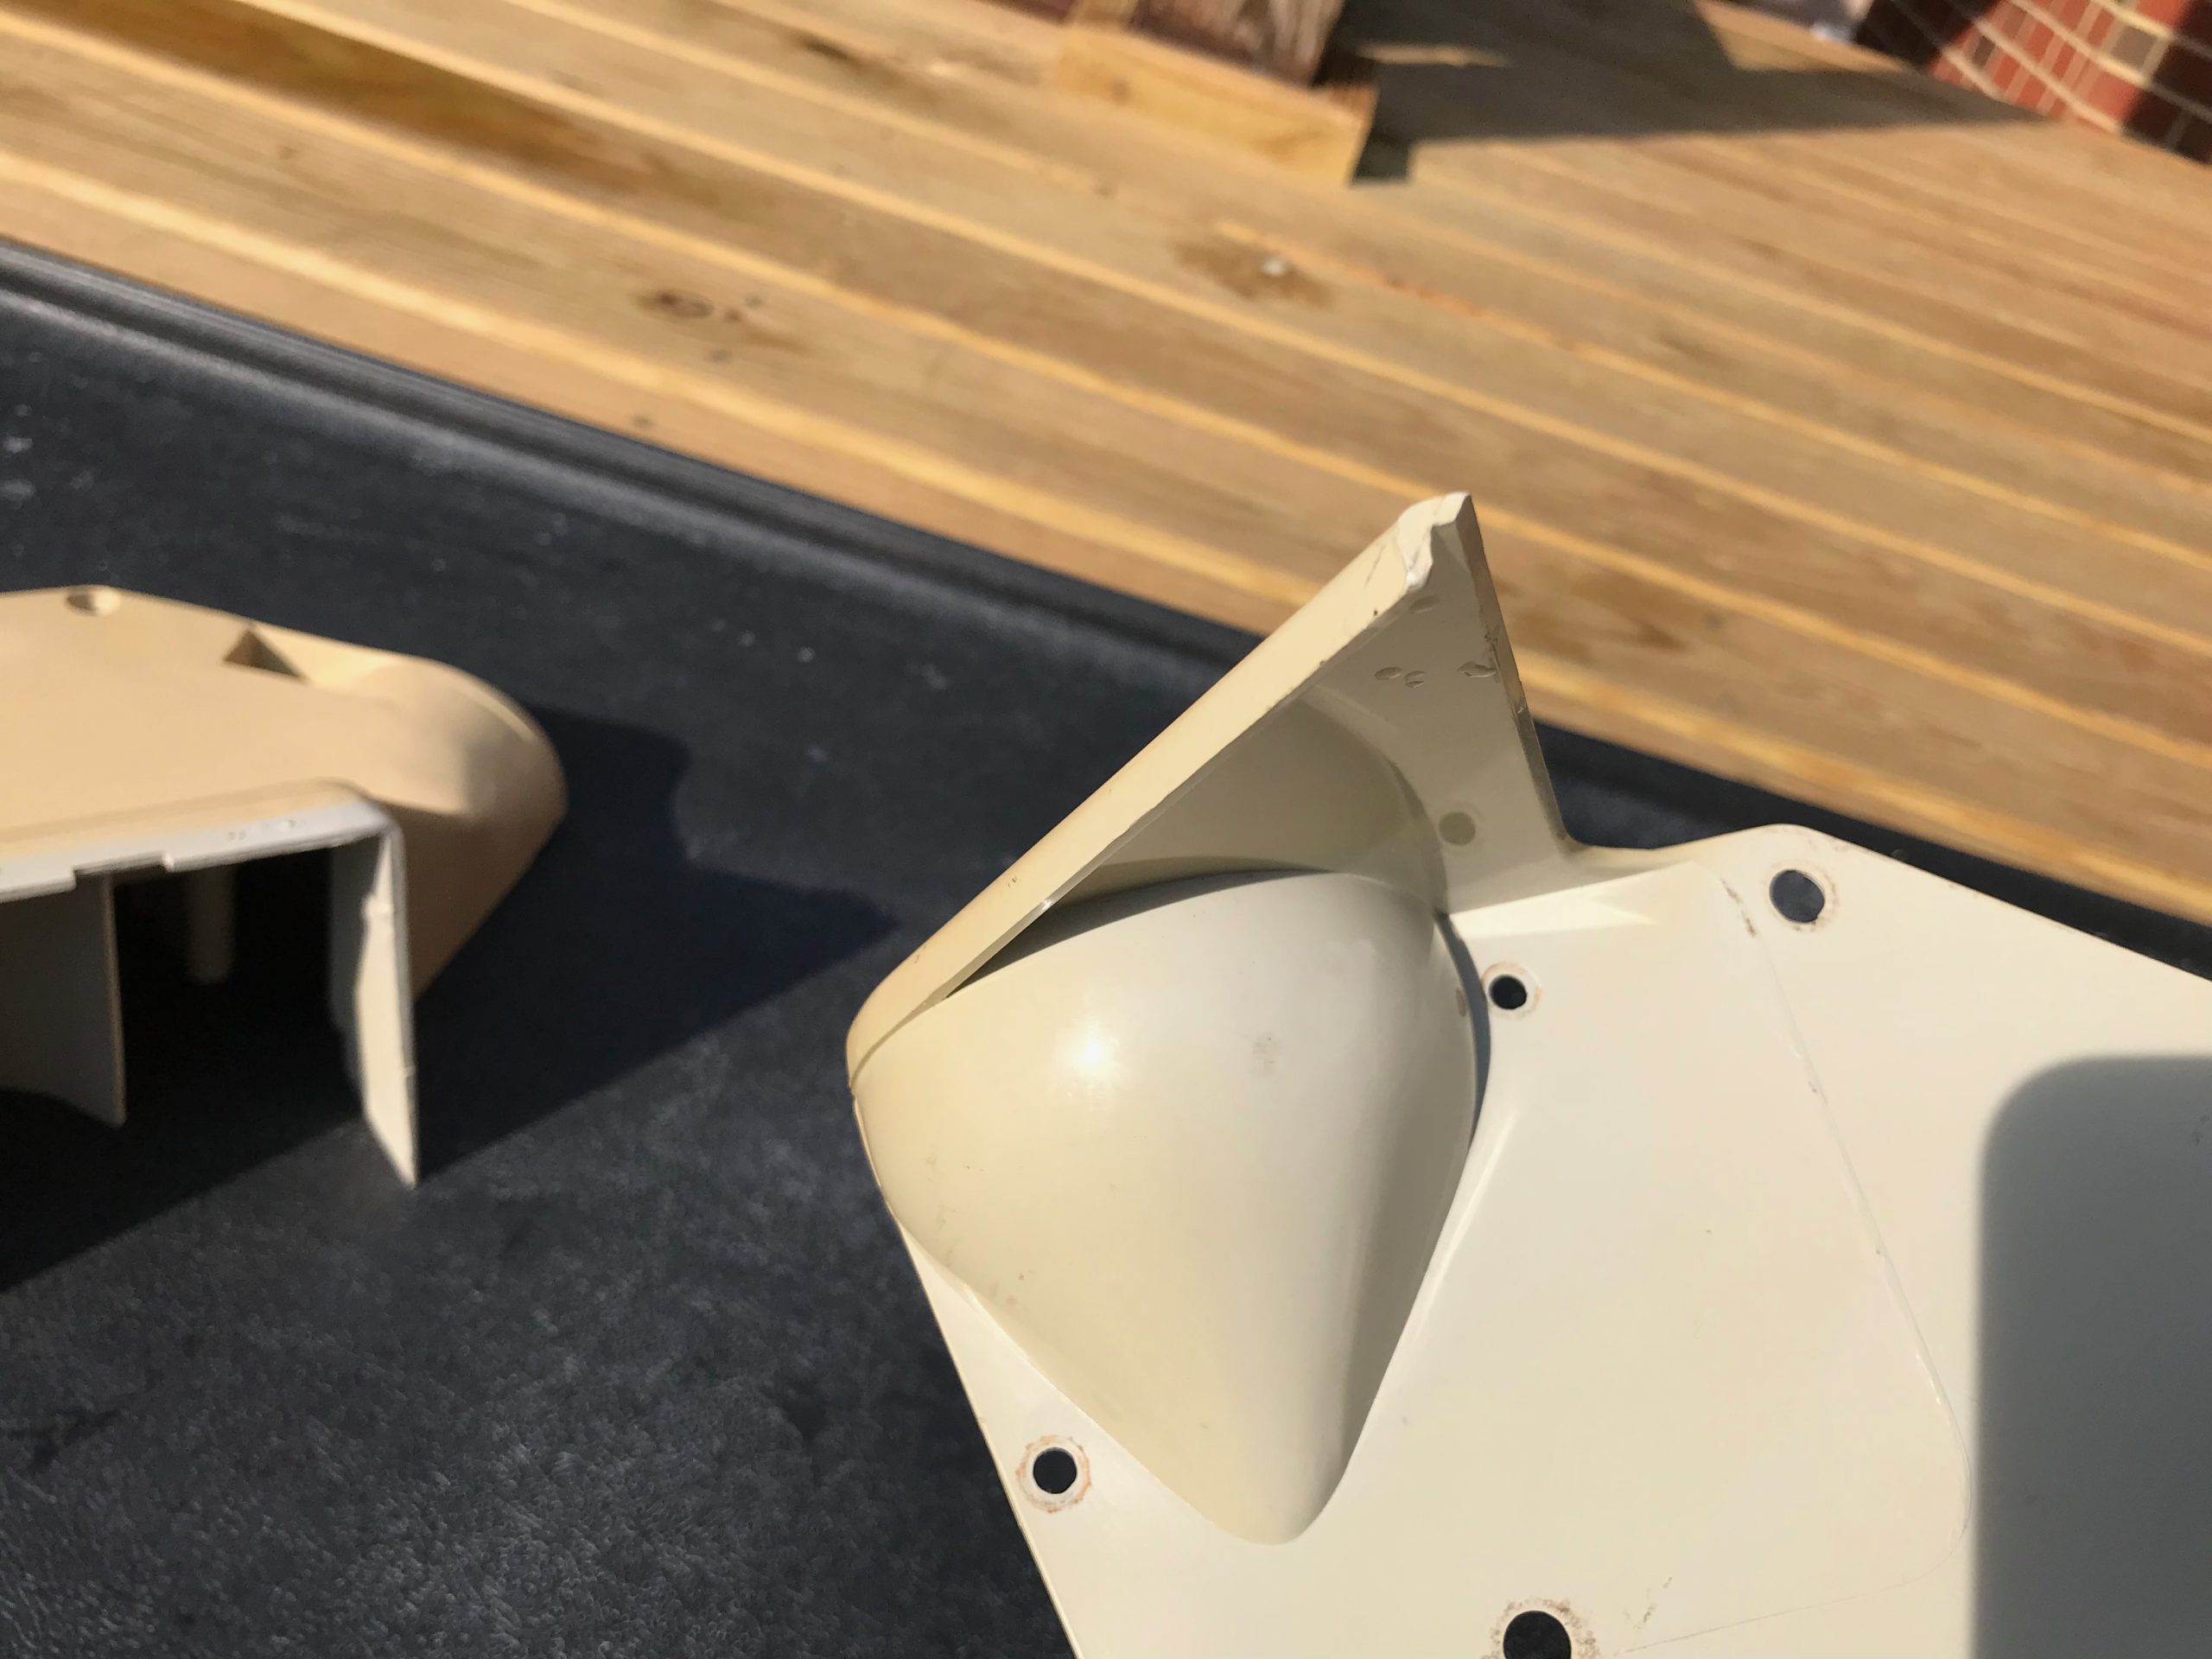
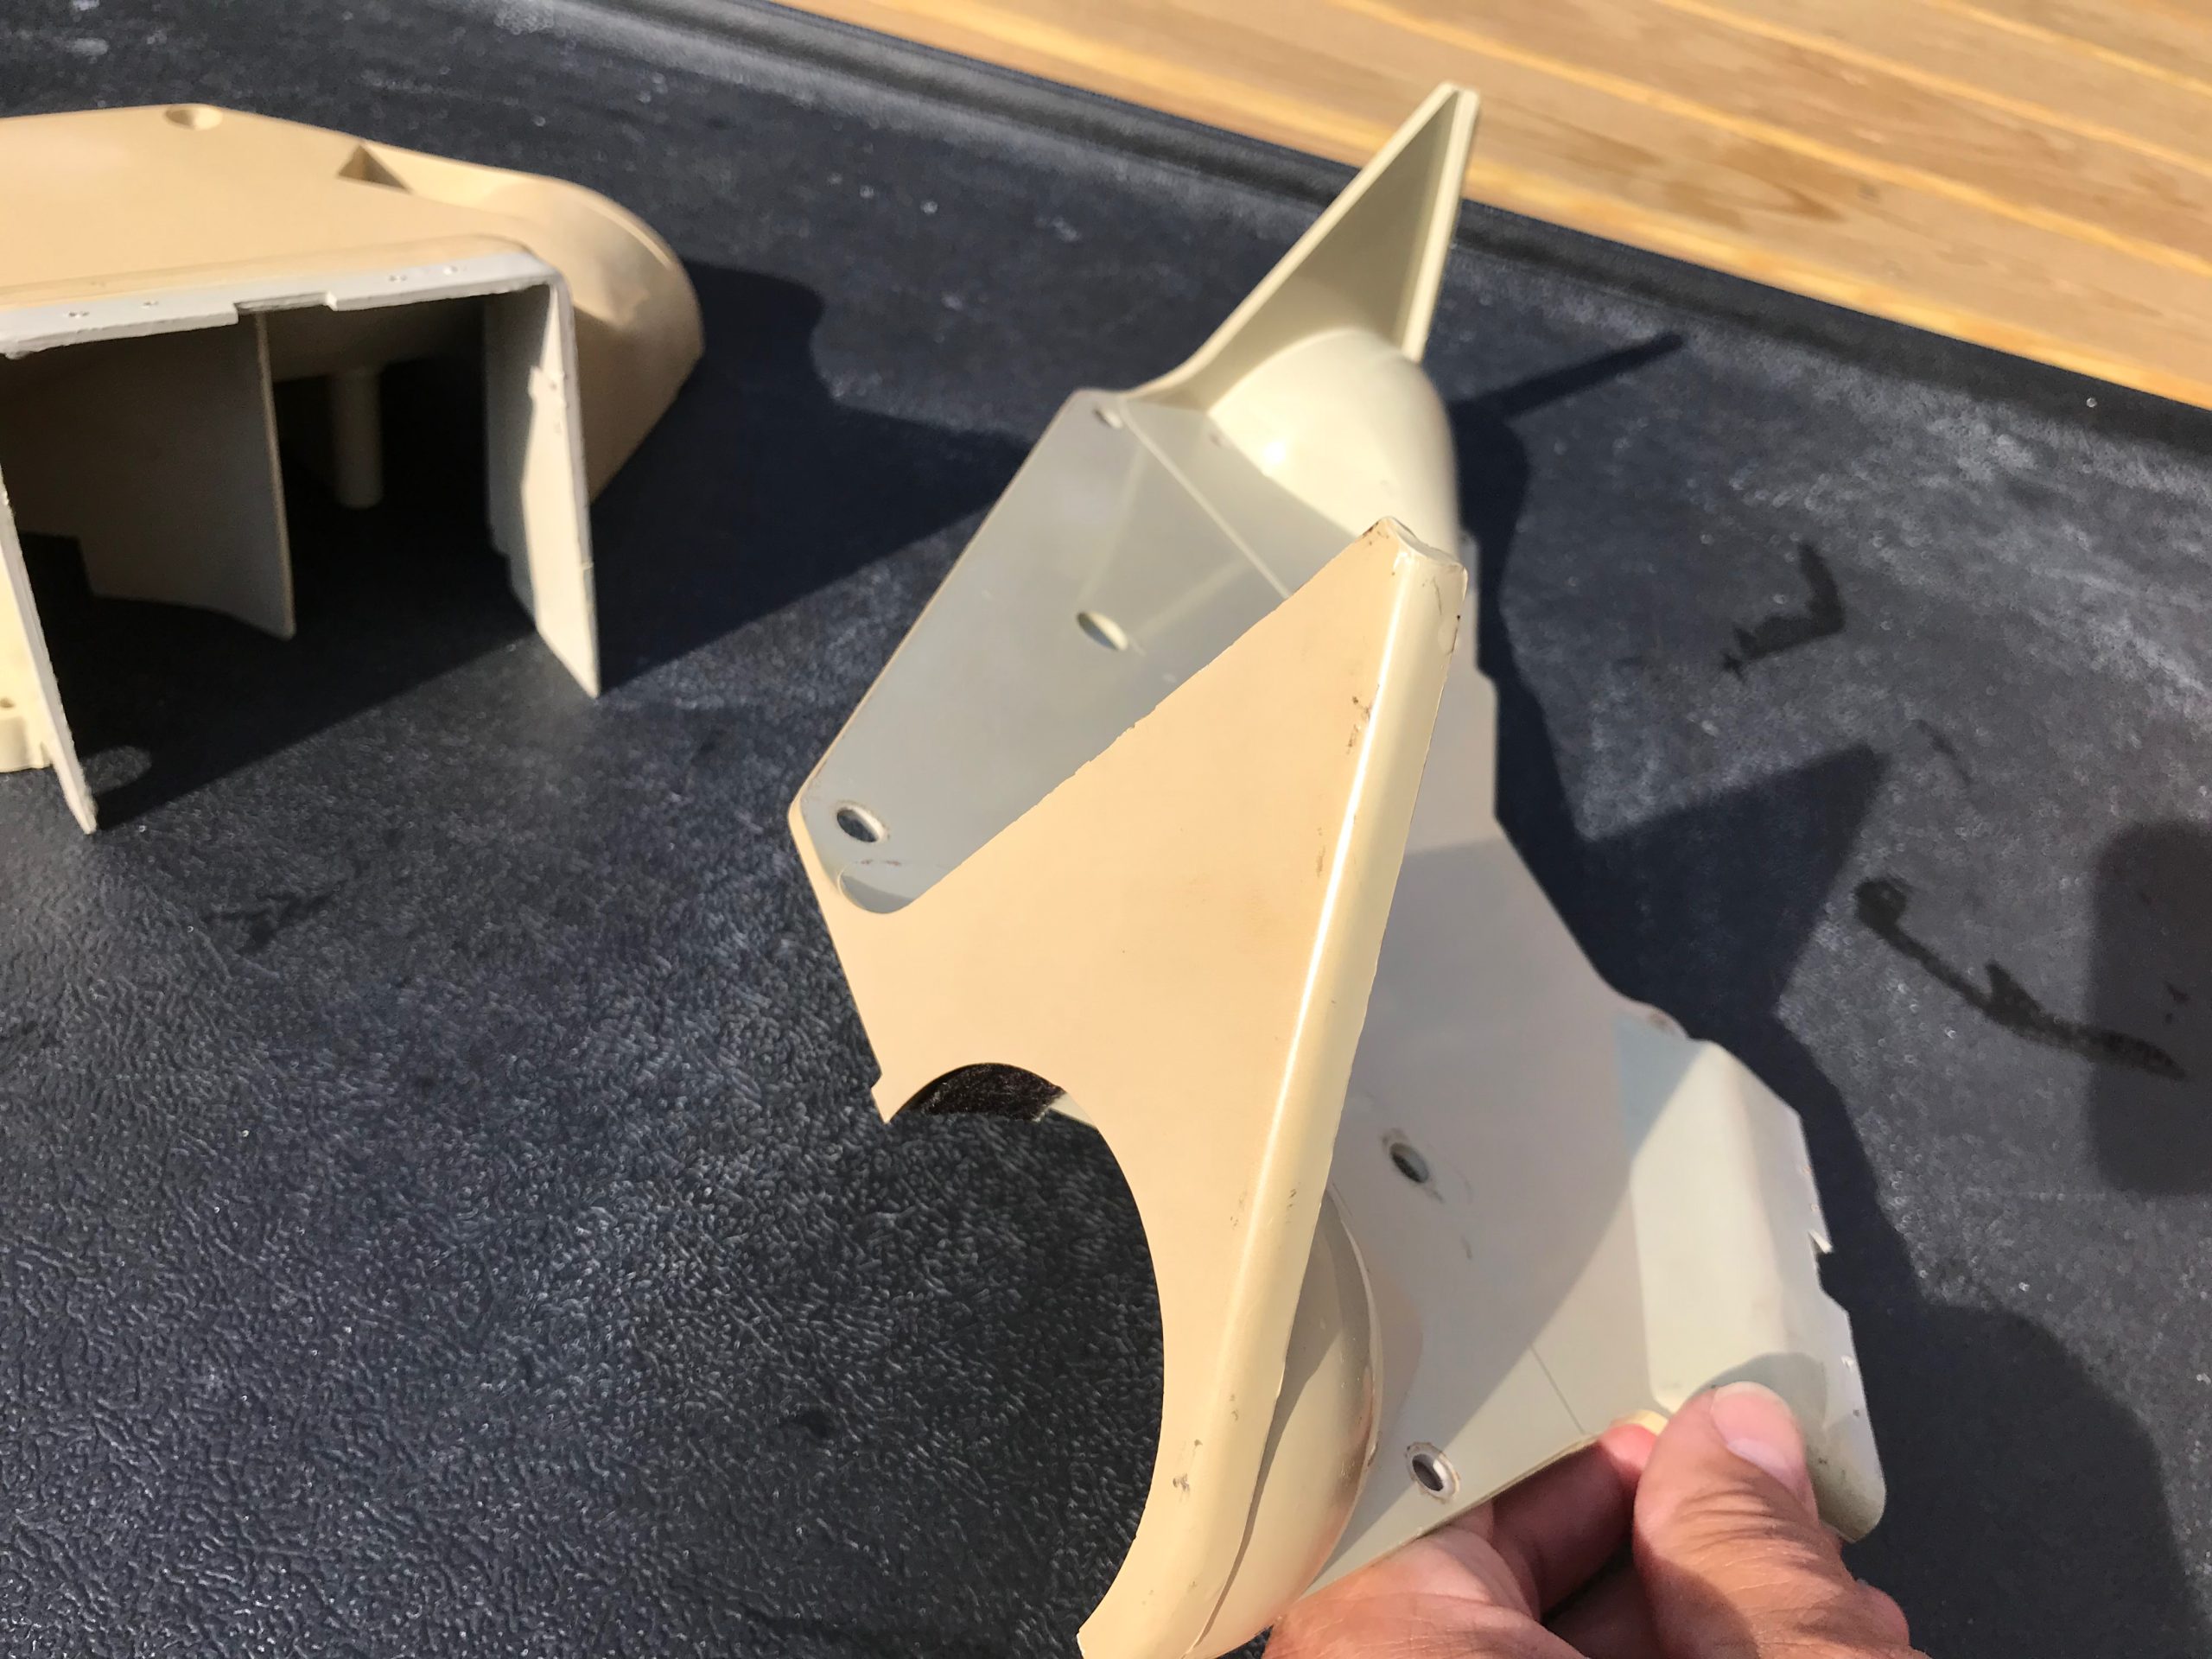
- Remove the two side vent balls
- Remove the center deflector assembly – be careful not to damage the case.
- Remove the control switch and wiring harness
- Remove the control cable. Depending on your unit, this may be a two piece unit with swivel (’61-’63) or a one piece unit (’64). If two piece unit, remove swivel and rear cable being careful not to break swivel pivot. Now would be a good time to re-lubricate the cable.
- Carefully pry off the bow-tie clips from inside the case, taking care not to break the bow-tie posts, and remove the bow-ties.
Plastic Chrome Pieces
The plastic chrome pieces (balls and bowties) can be refinished if they are not damaged (scratched, gouged, etc.). Mark Corbin provides this service for a reasonable fee, but you can probably find other companies that can do it as well. The items need to be stripped of all existing “chrome” and that is easily accomplished by soaking them in Bleche Wite Tire Cleaner for a few hours. After stripping they will look like this:

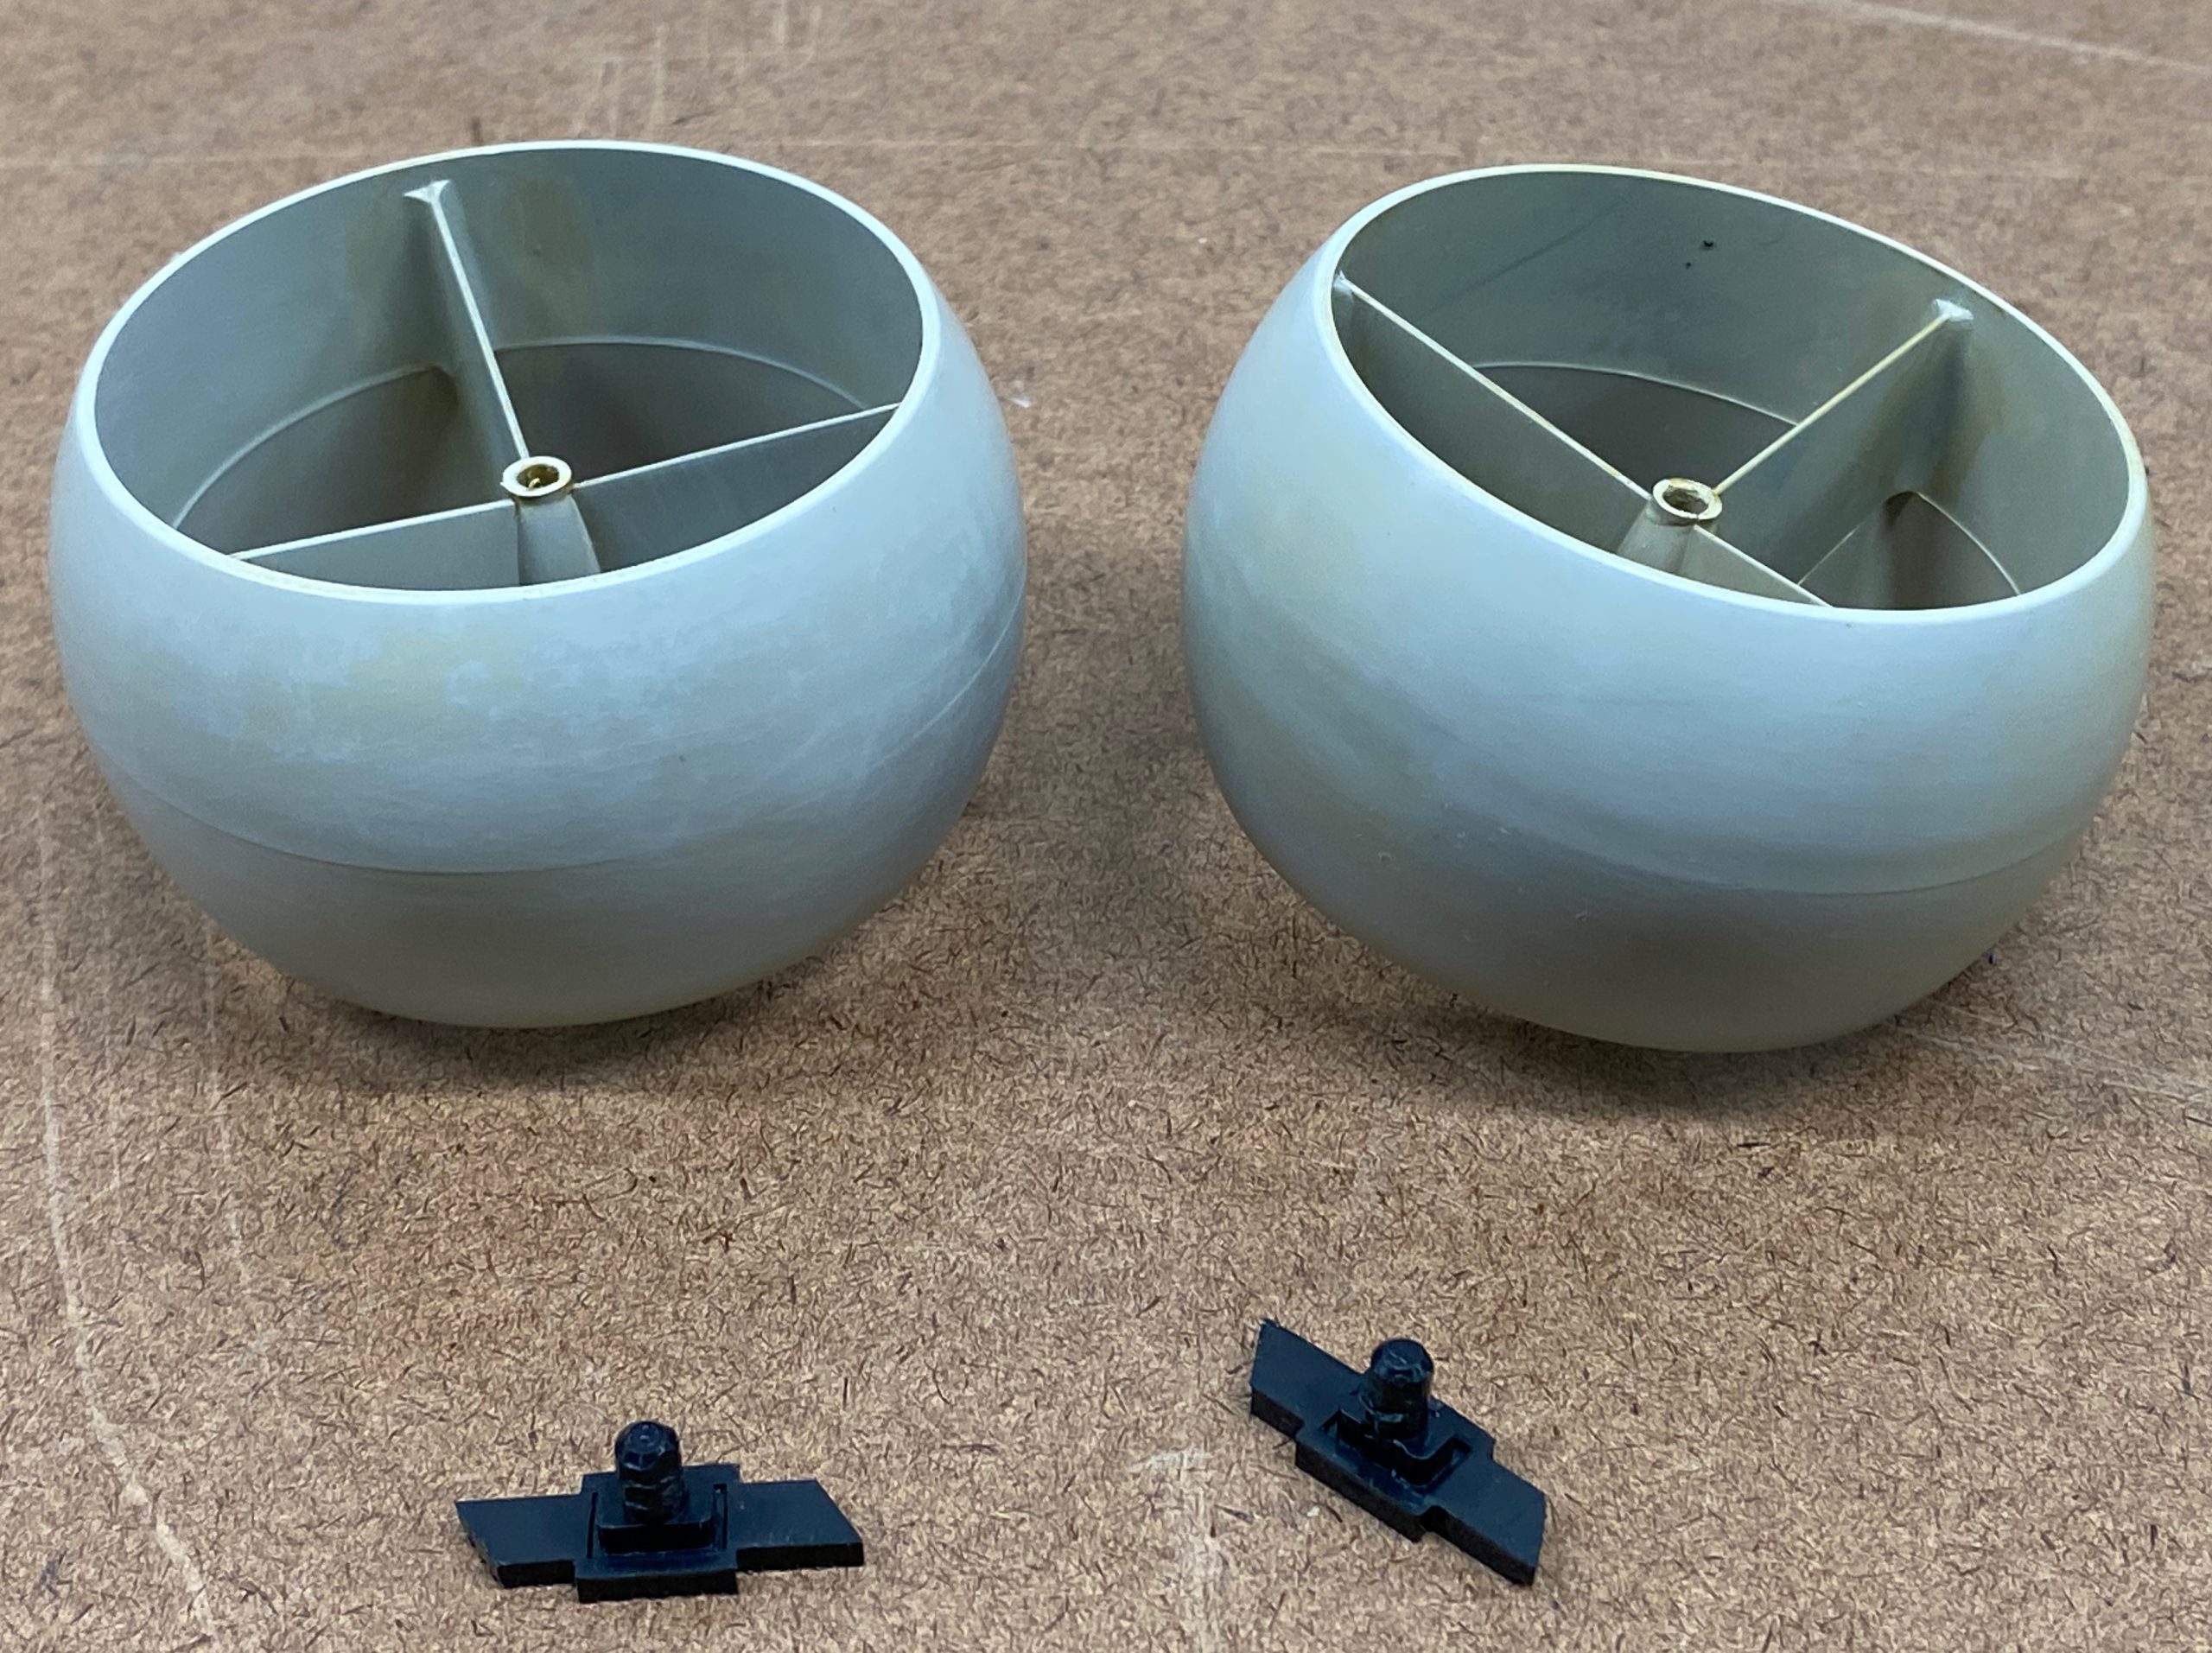
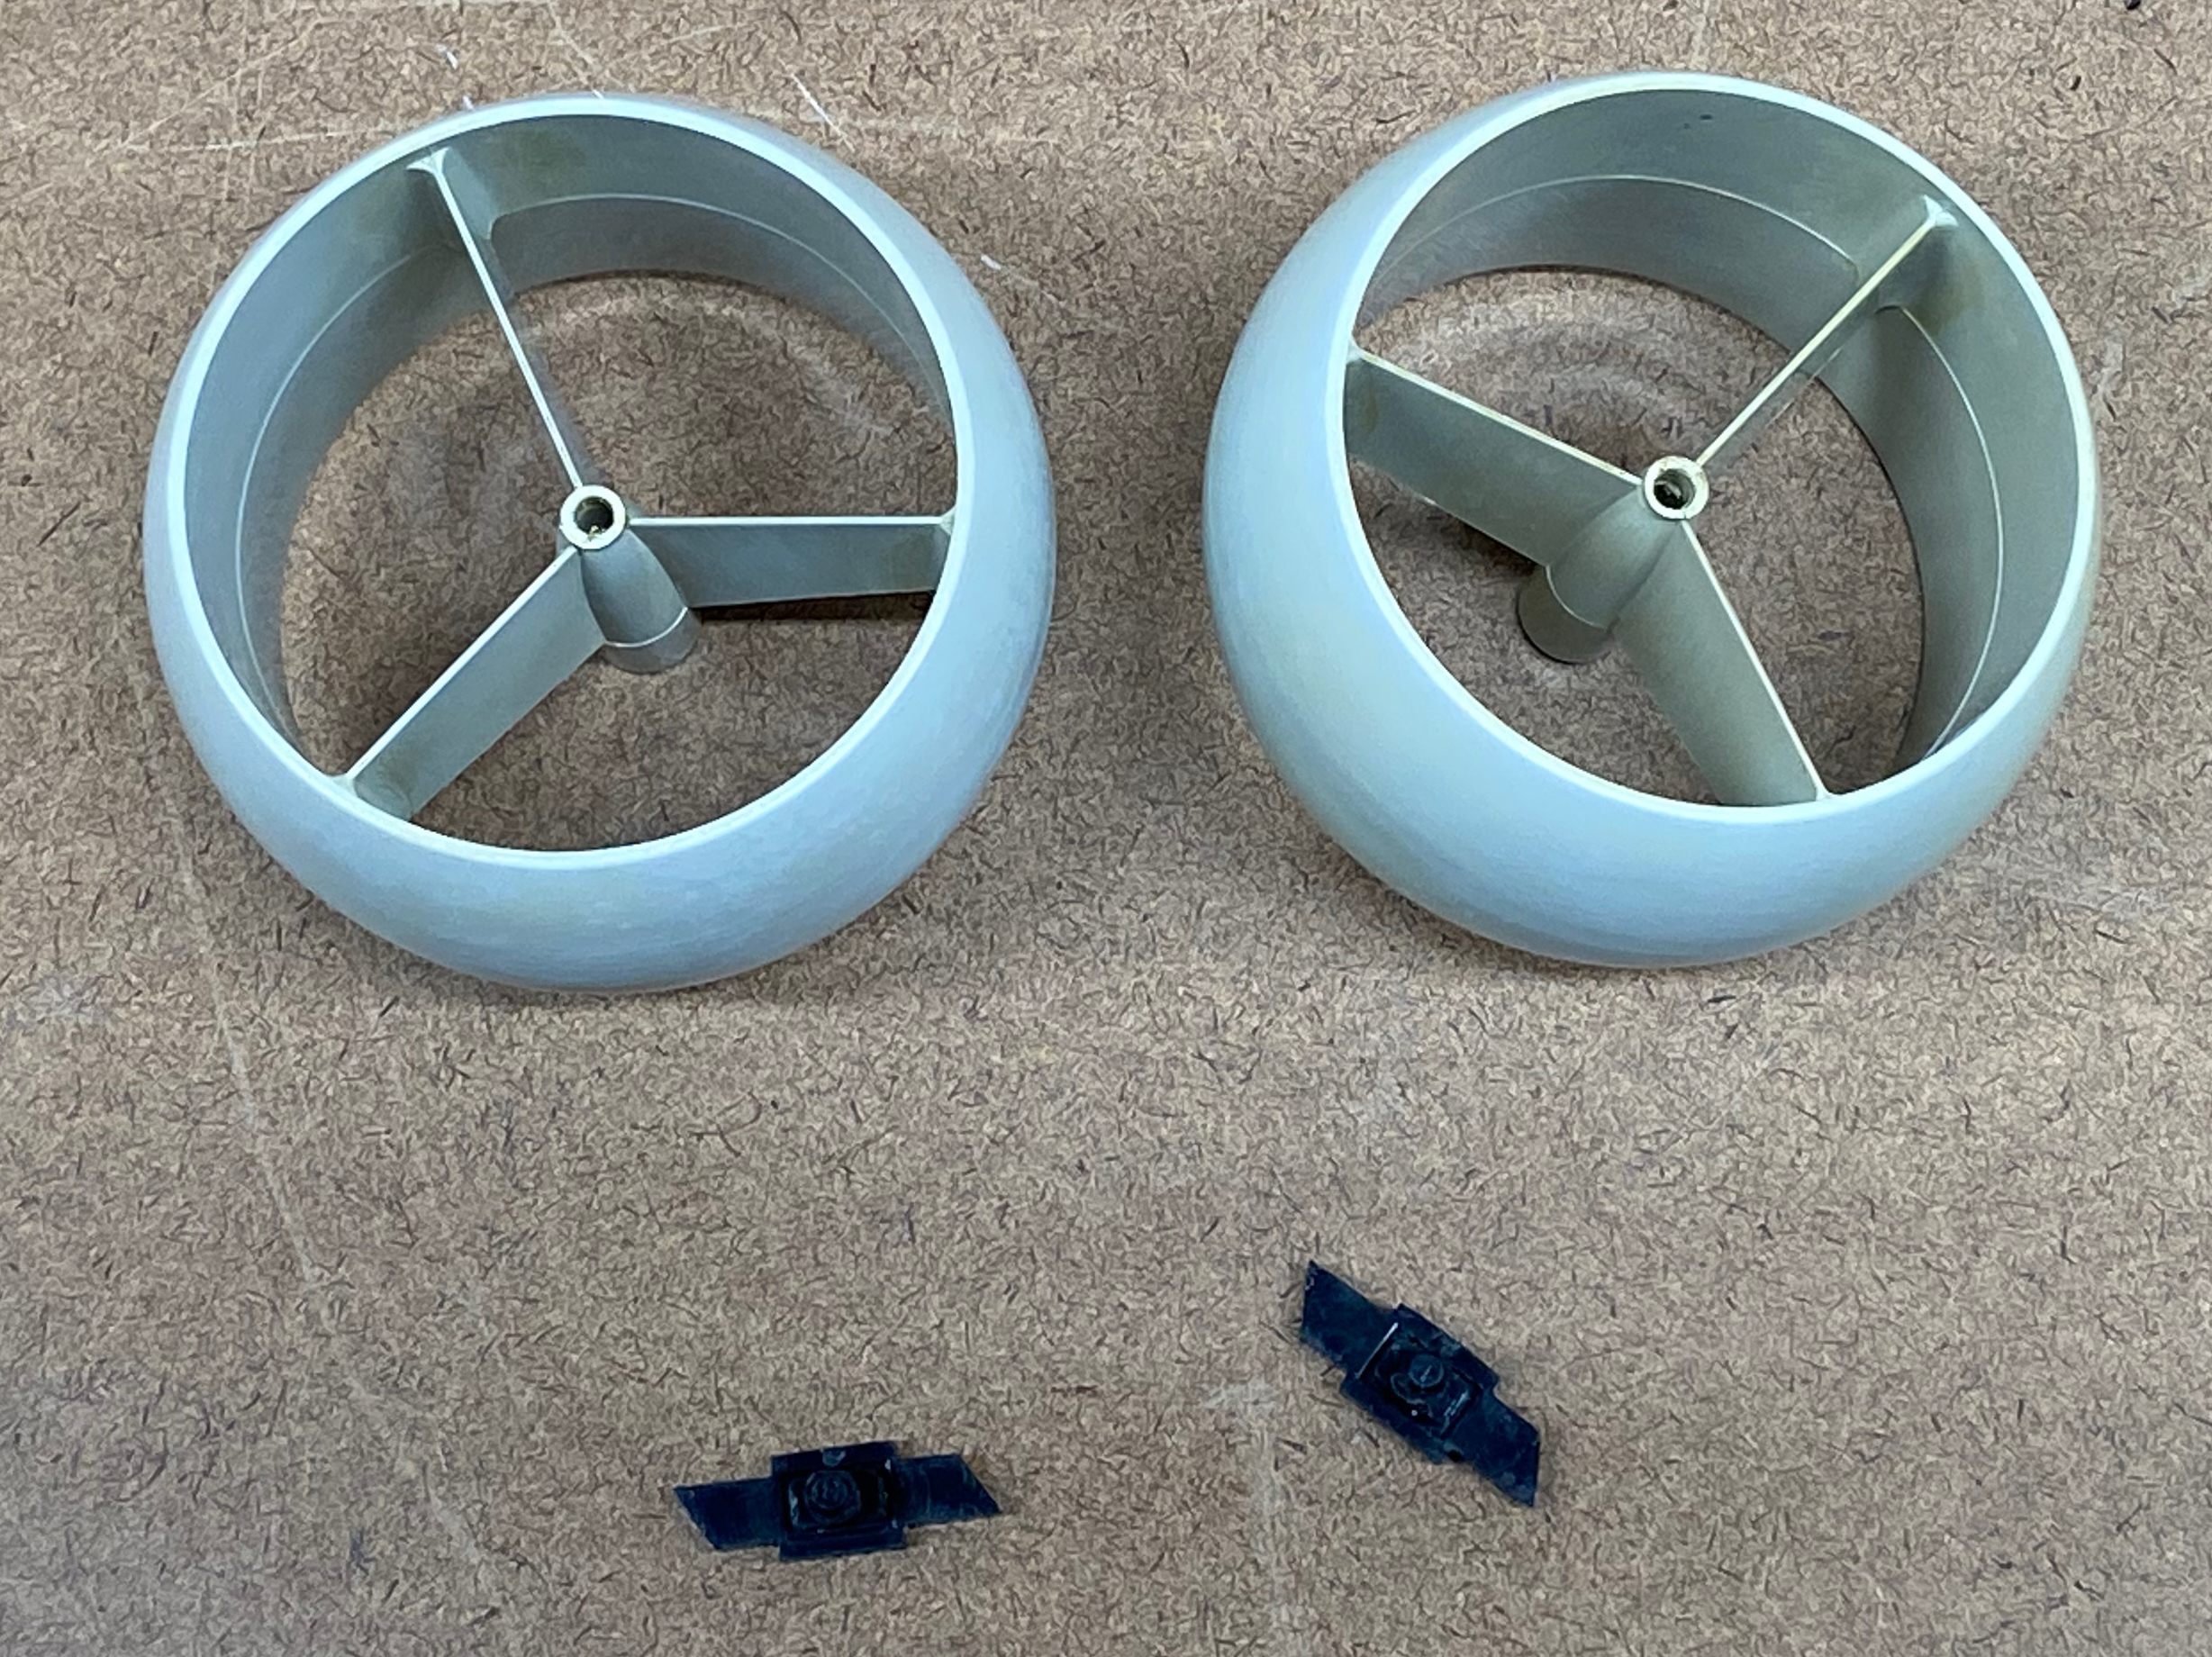
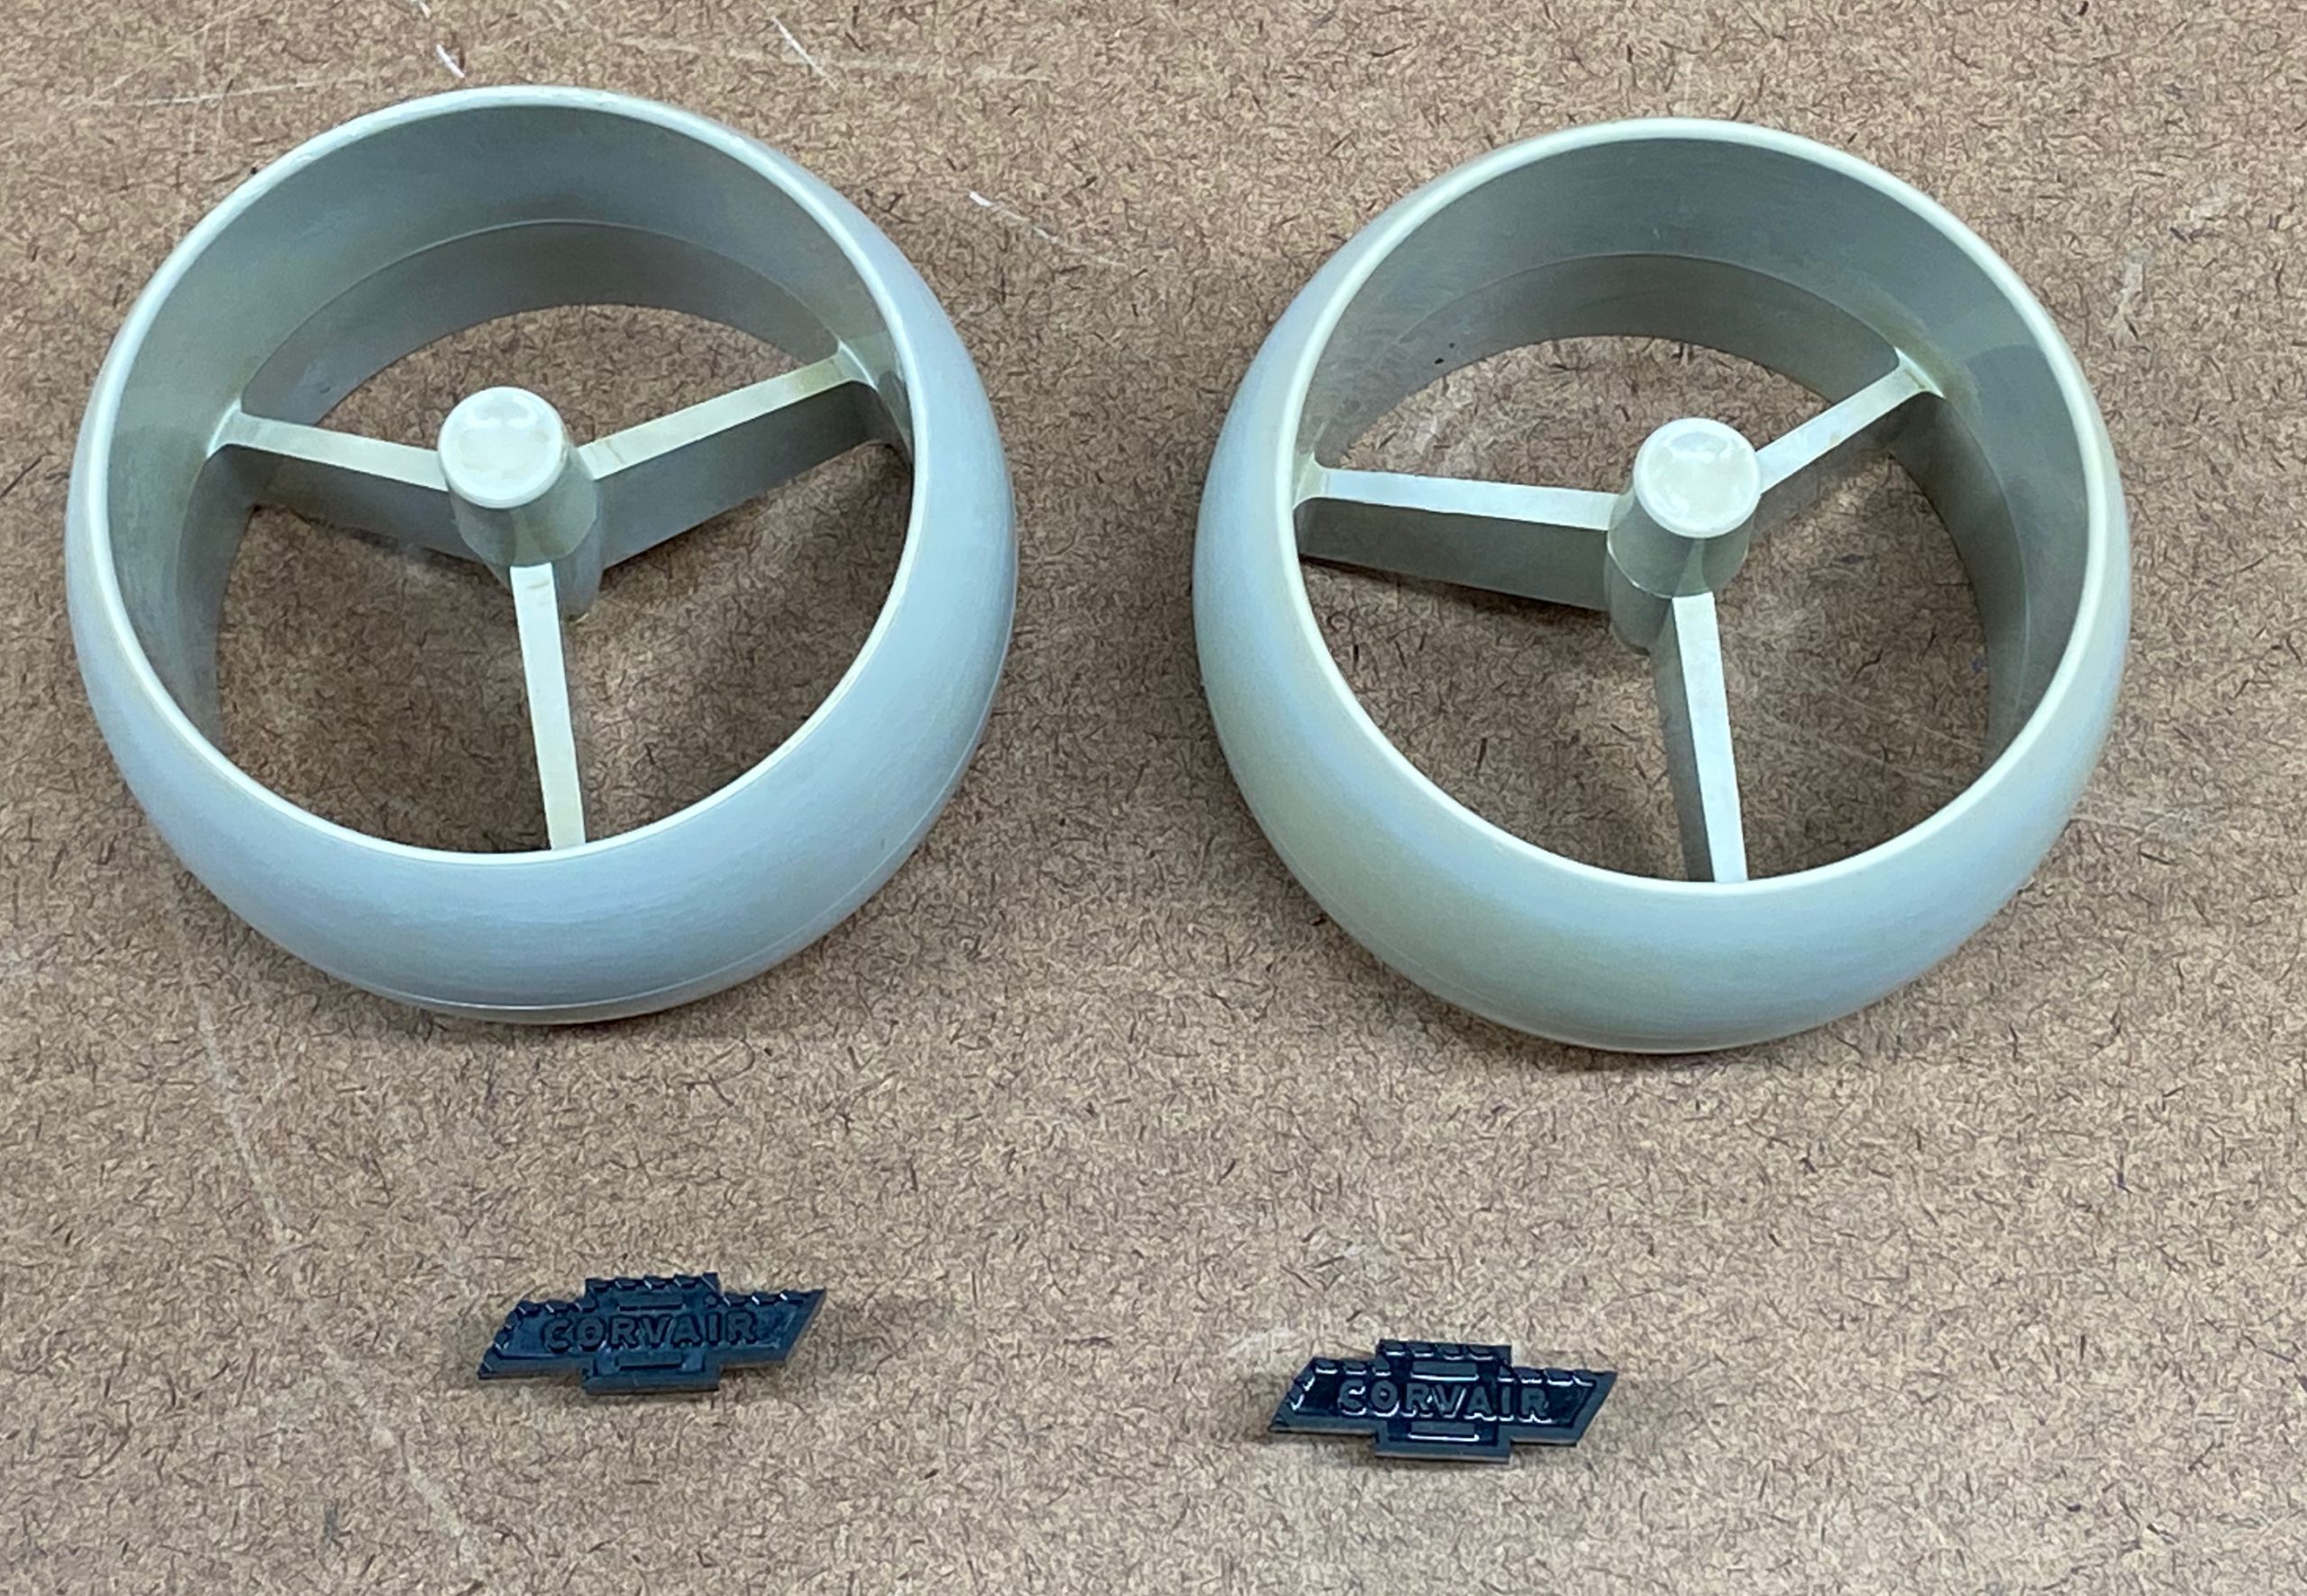
Note that the bowties are black plastic while the balls are grey. After the pieces are rechromed, you will need to lightly flat-sand the raised face of the bowties to remove the chrome from the raised portion and reveal the black color underneath.

Metal Chrome Pieces
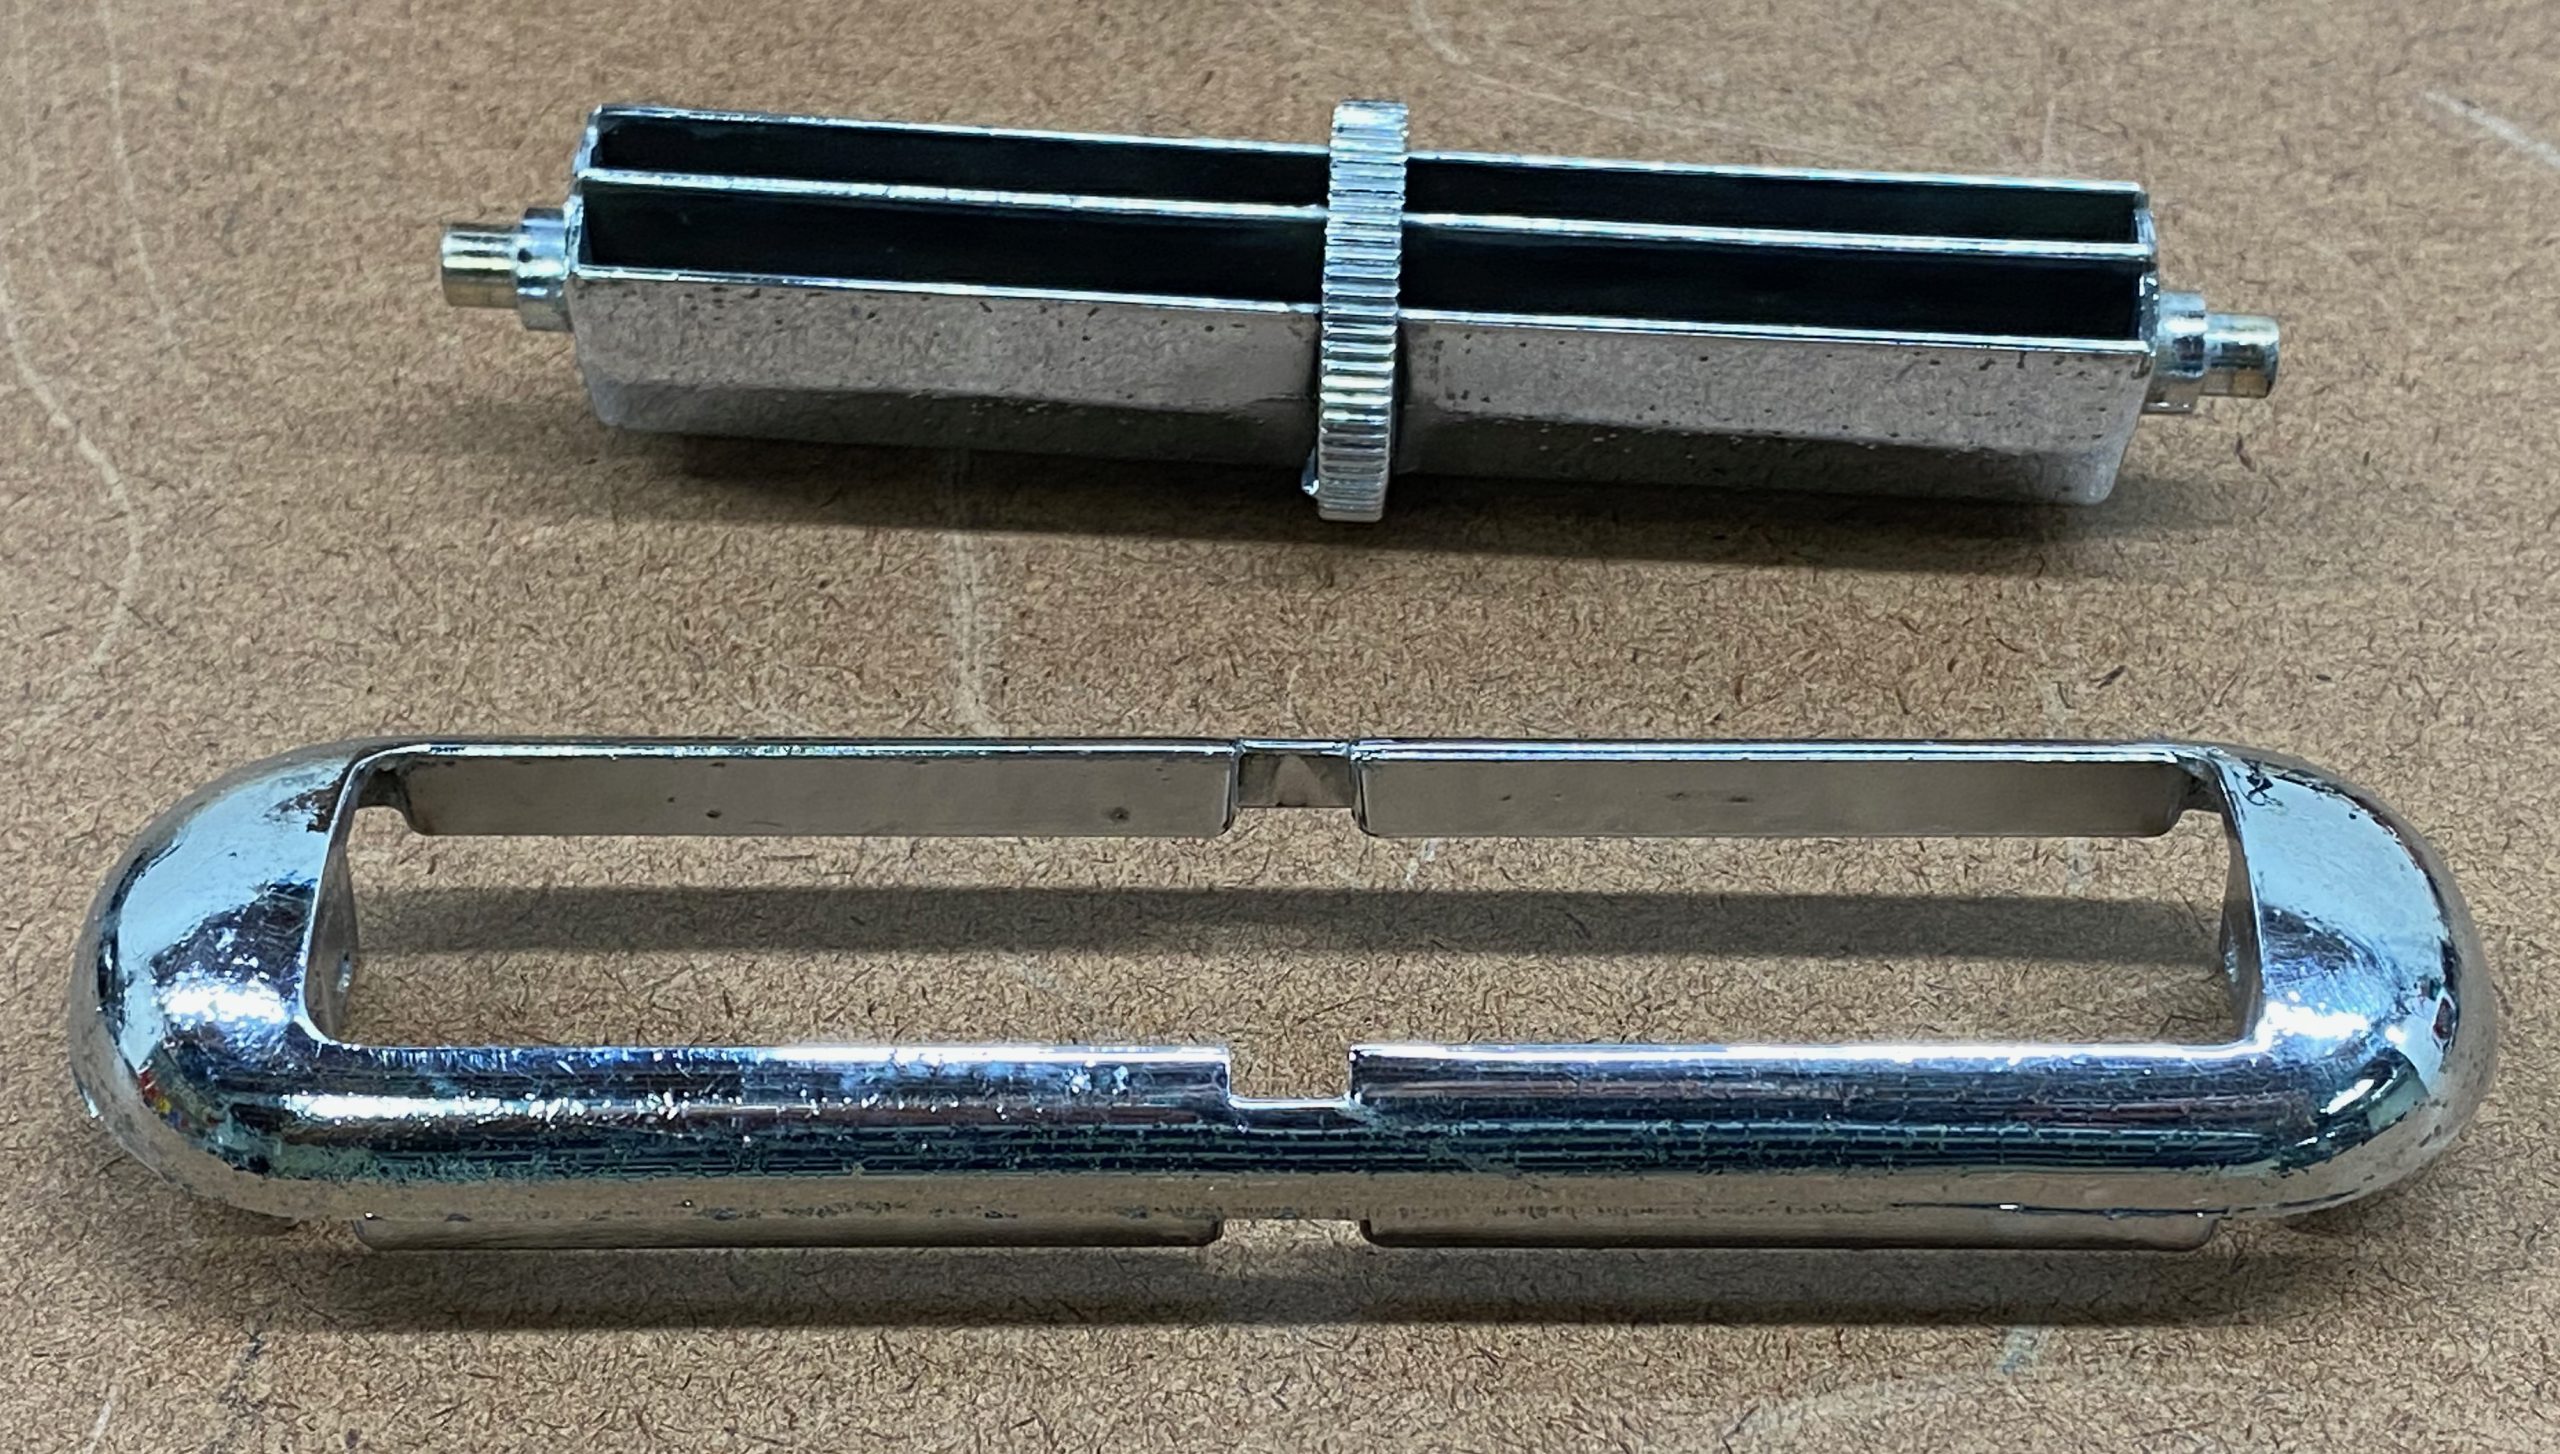
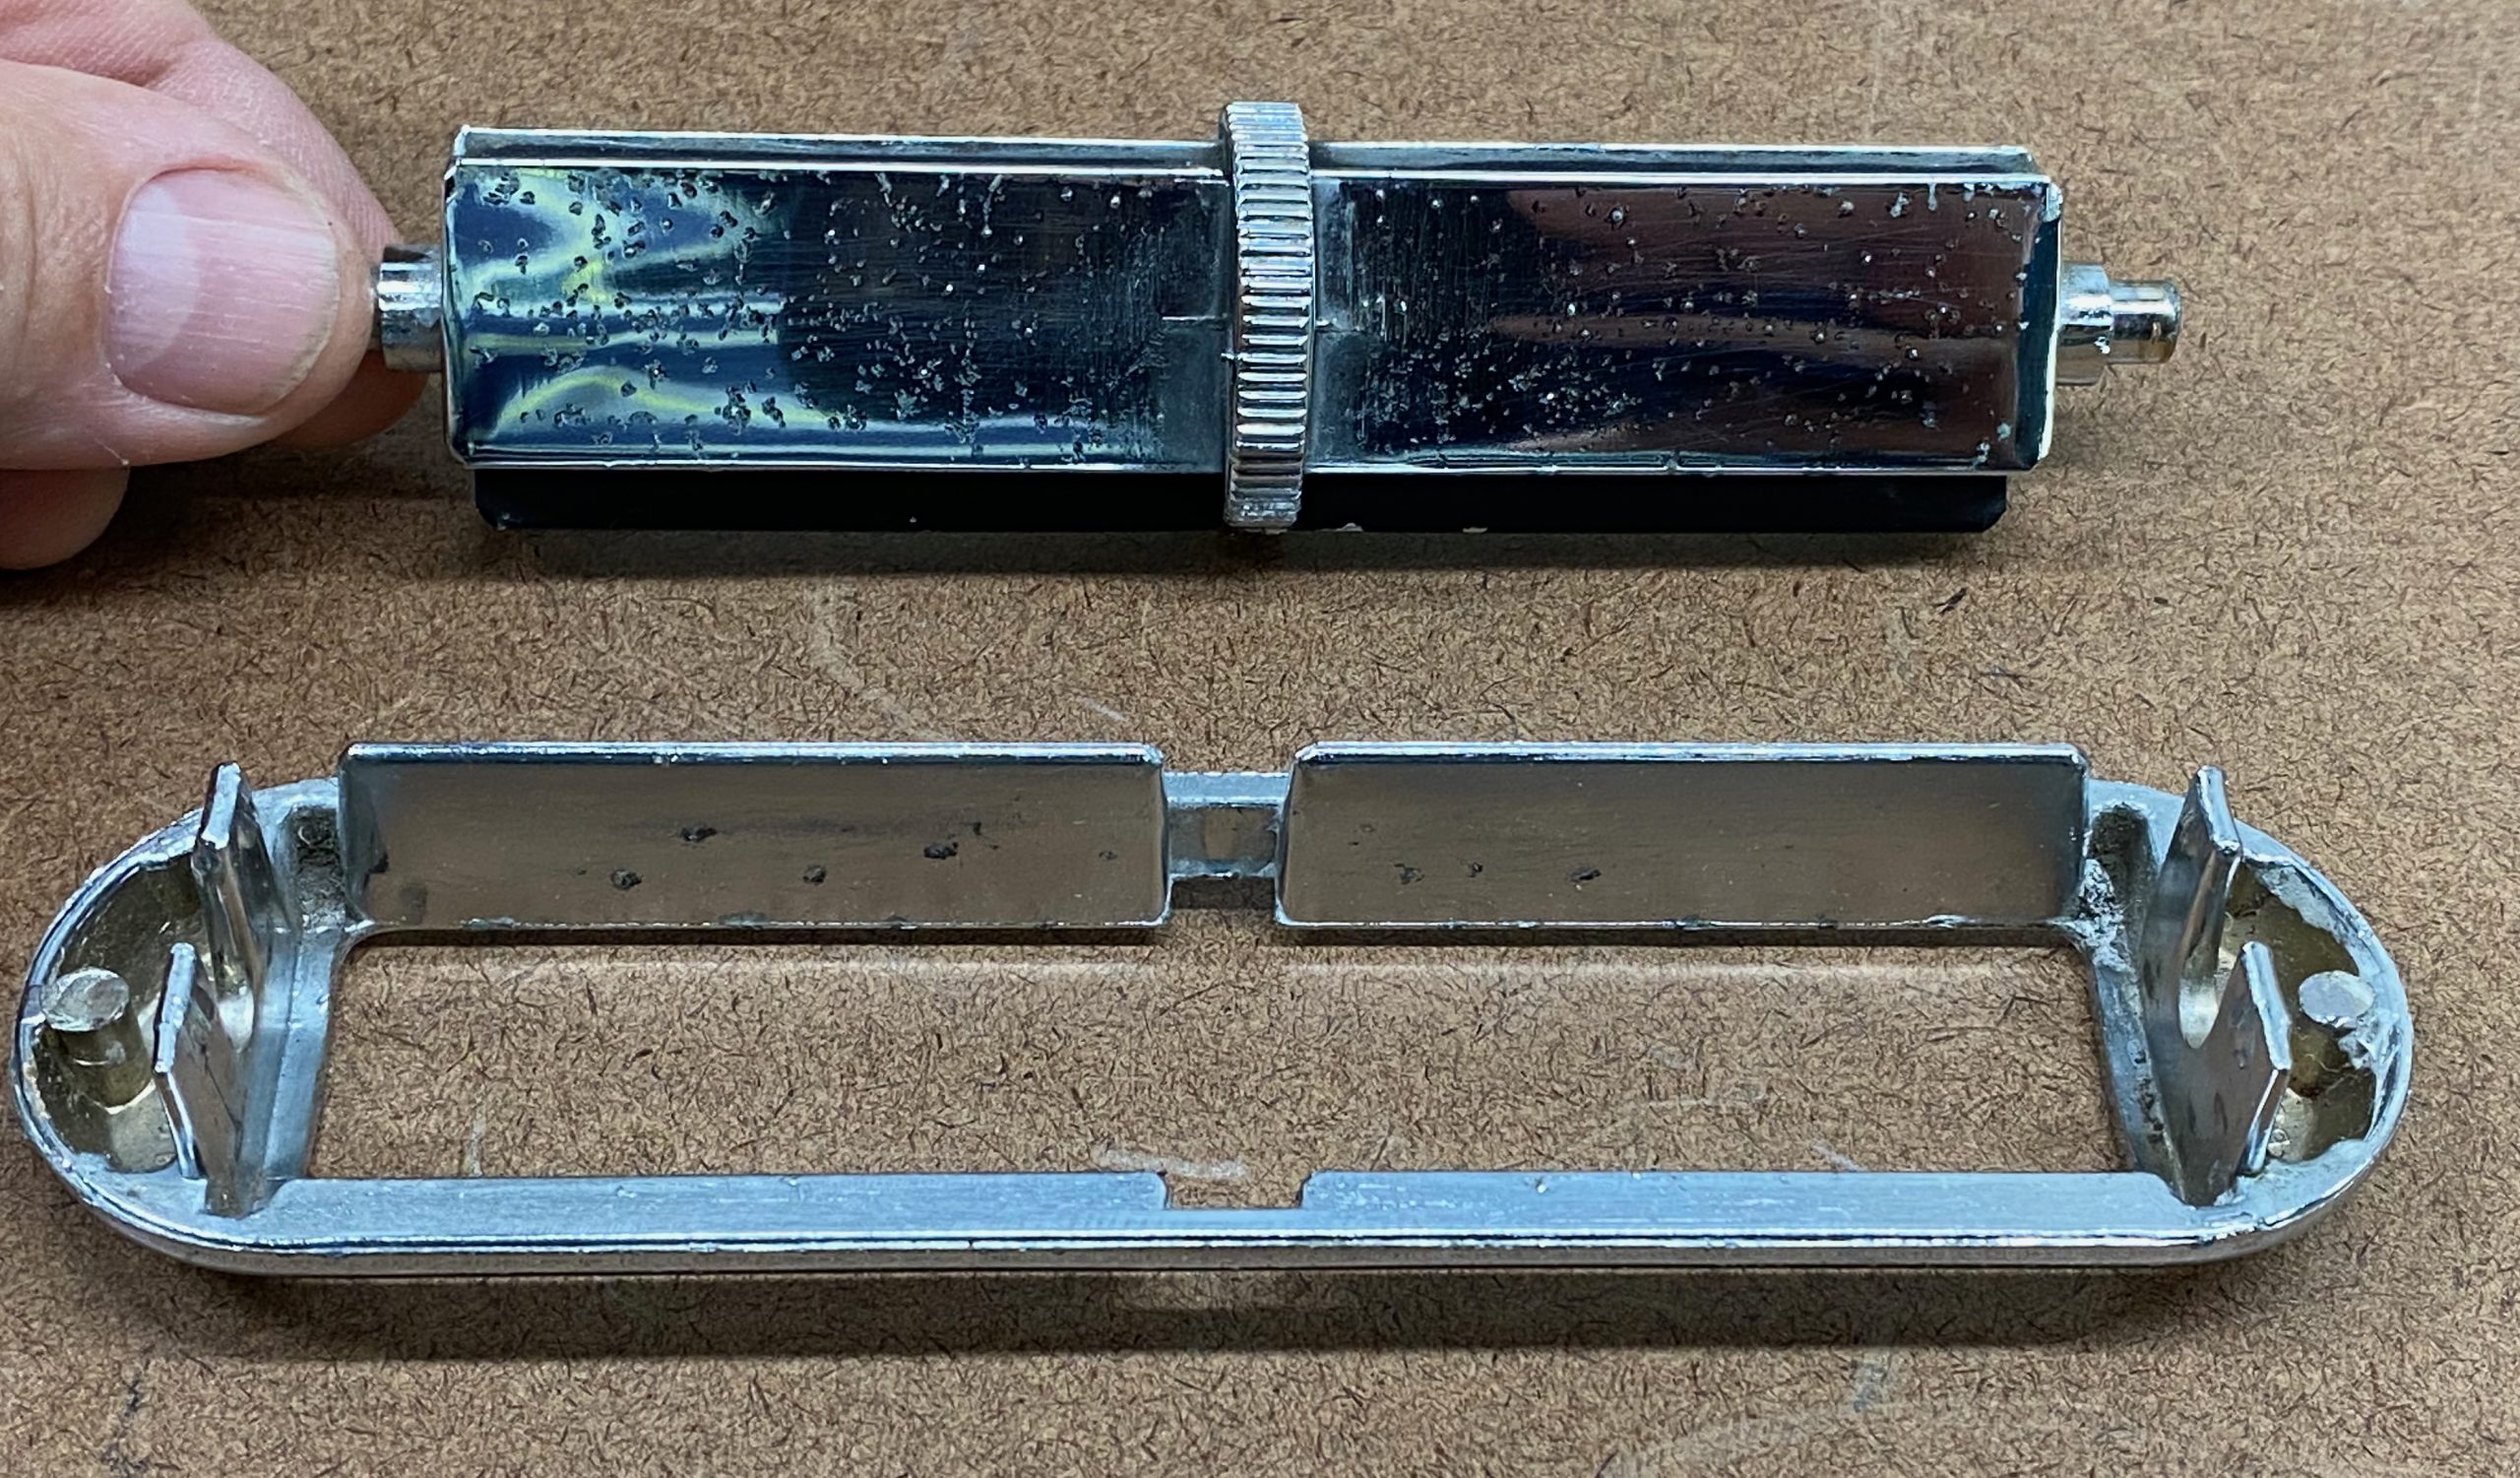
The center deflector assembly is chromed pot metal. While this technically can be re-chromed, it is very difficult and expensive to find a company willing to do this, so try to find one in best condition possible. Use a small screwdriver to remove the two small clips on either side to disassemble unit to polish chrome and touch up black paint. Reverse procedure to reassemble.
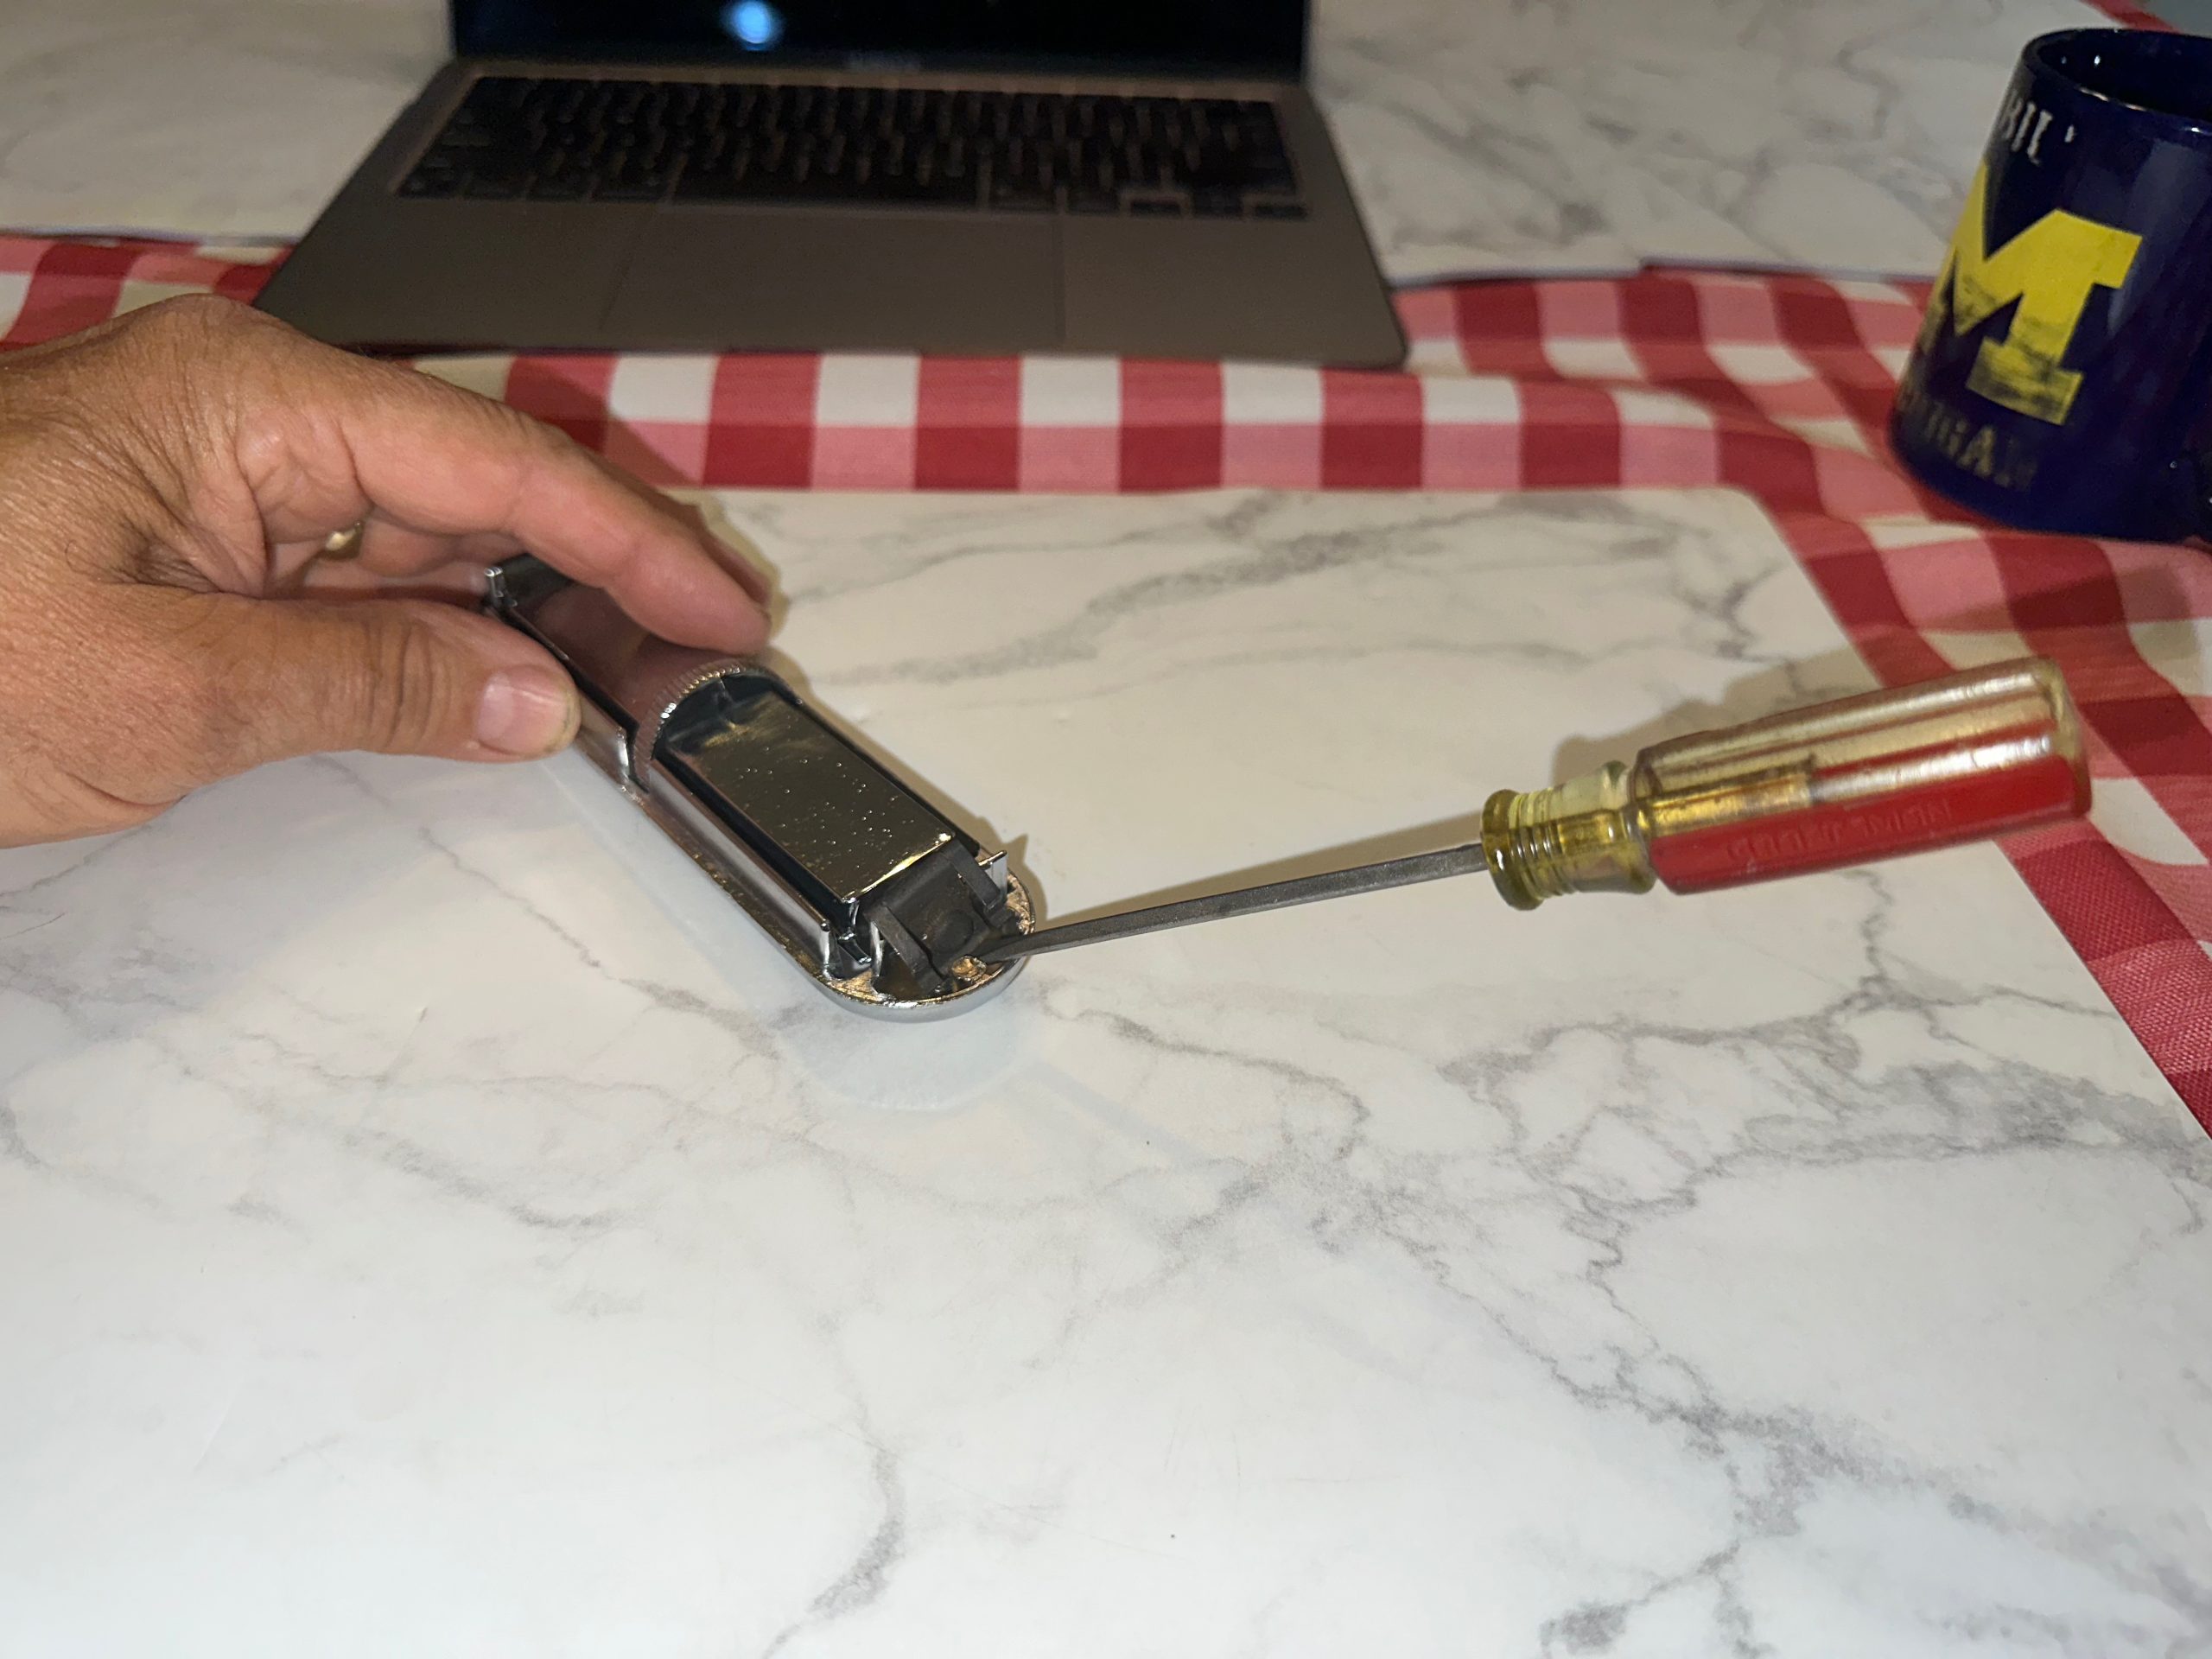


Also clean the chrome Knobs and shaft nuts using chrome cleaner. These could be sent out for re-chroming if necessary.

Case Cleaning
Begin by carefully peeling off the felt liners for the side ball vents on the upper and lower case halves. In most cases you should be able to remove these without damage and will set them aside for use in reassembly. Clean any remaining adhesive off the case halves.
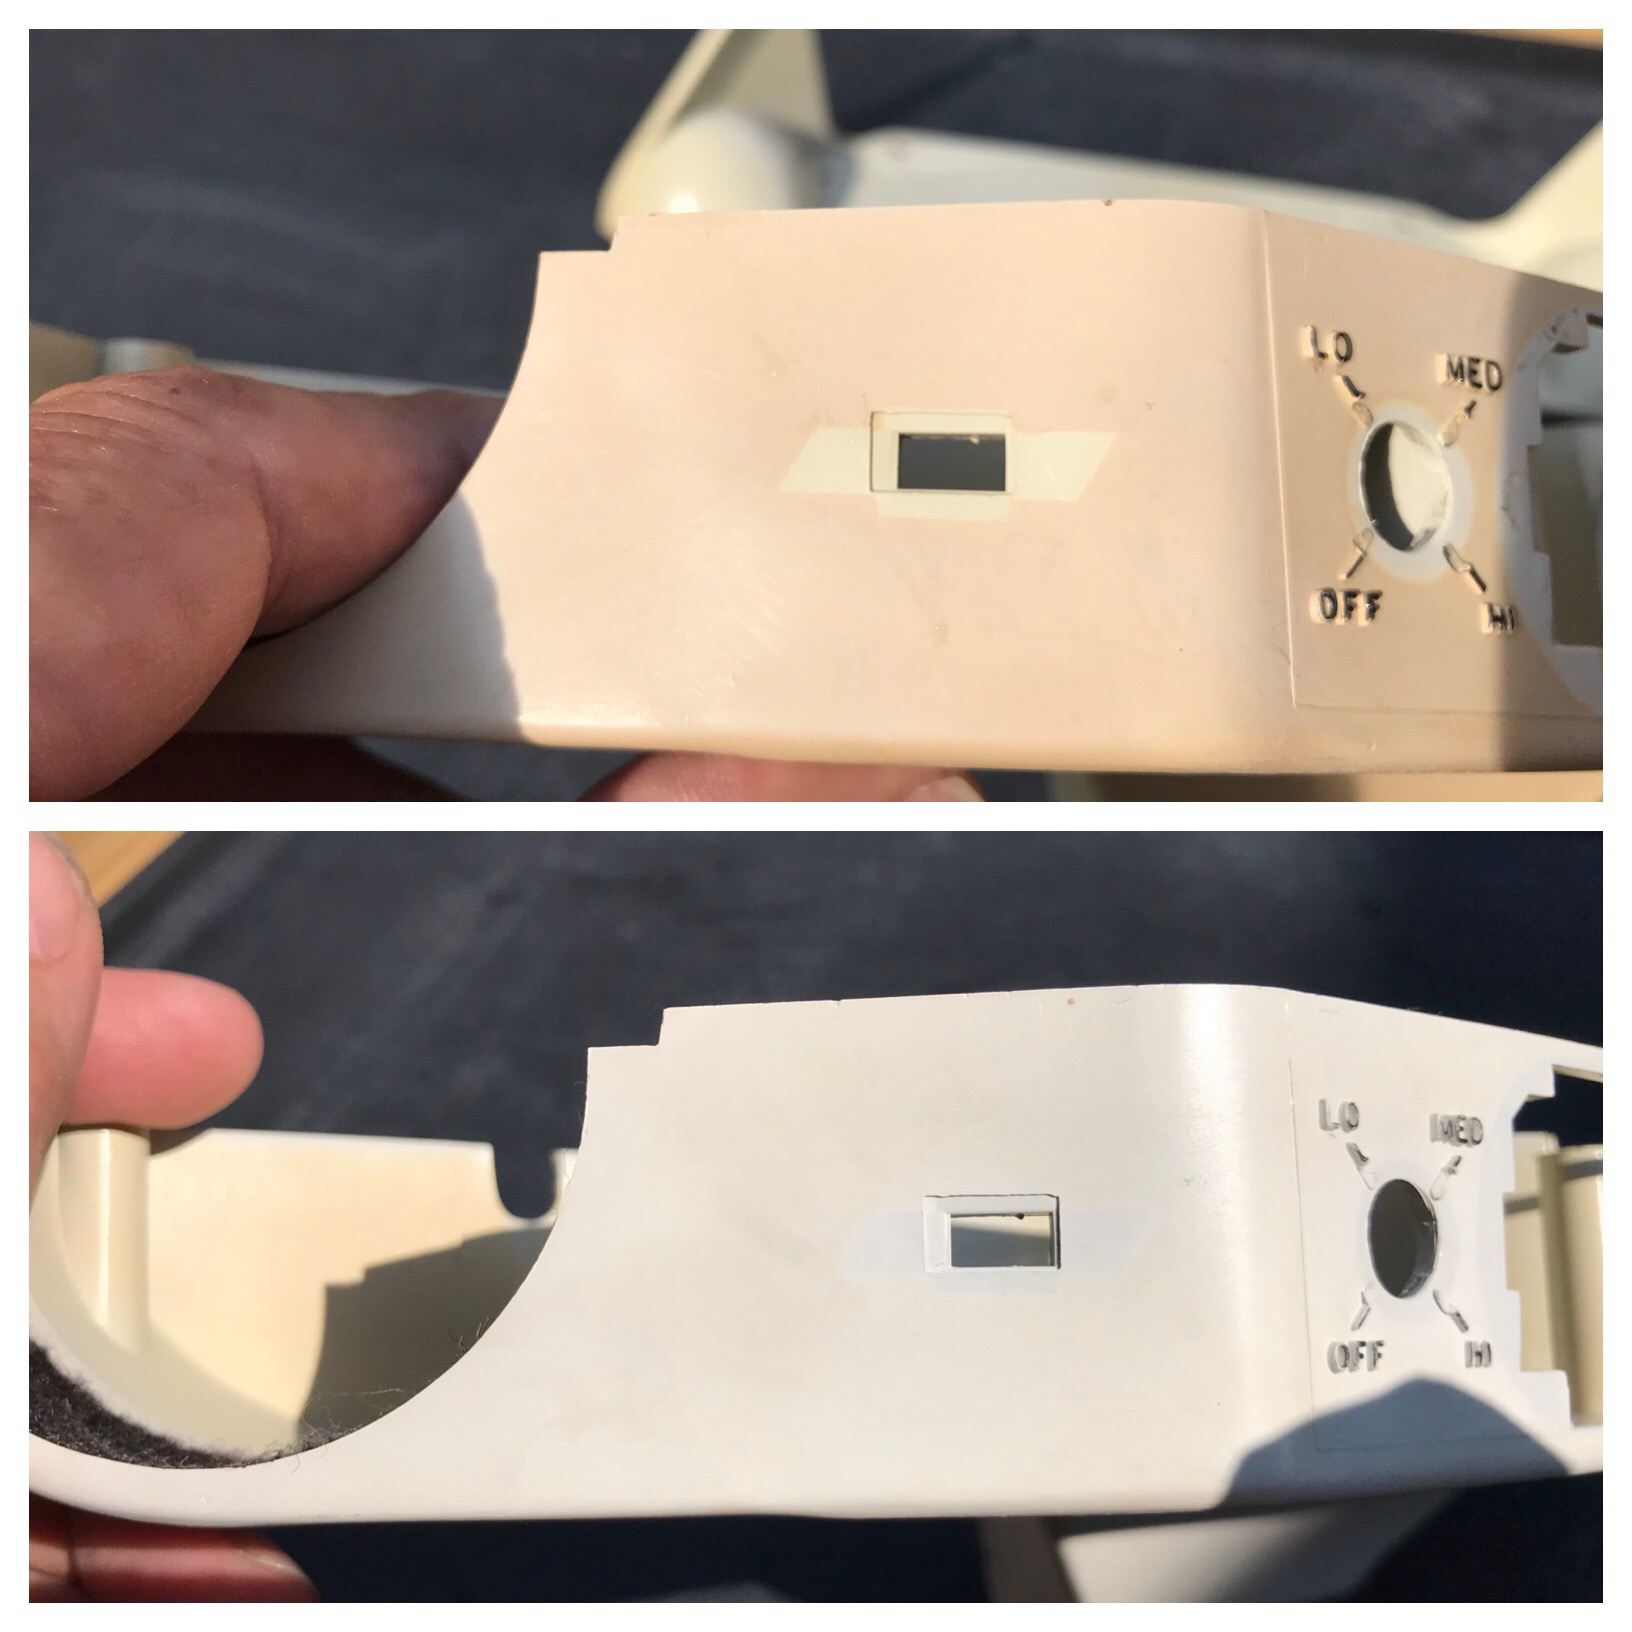
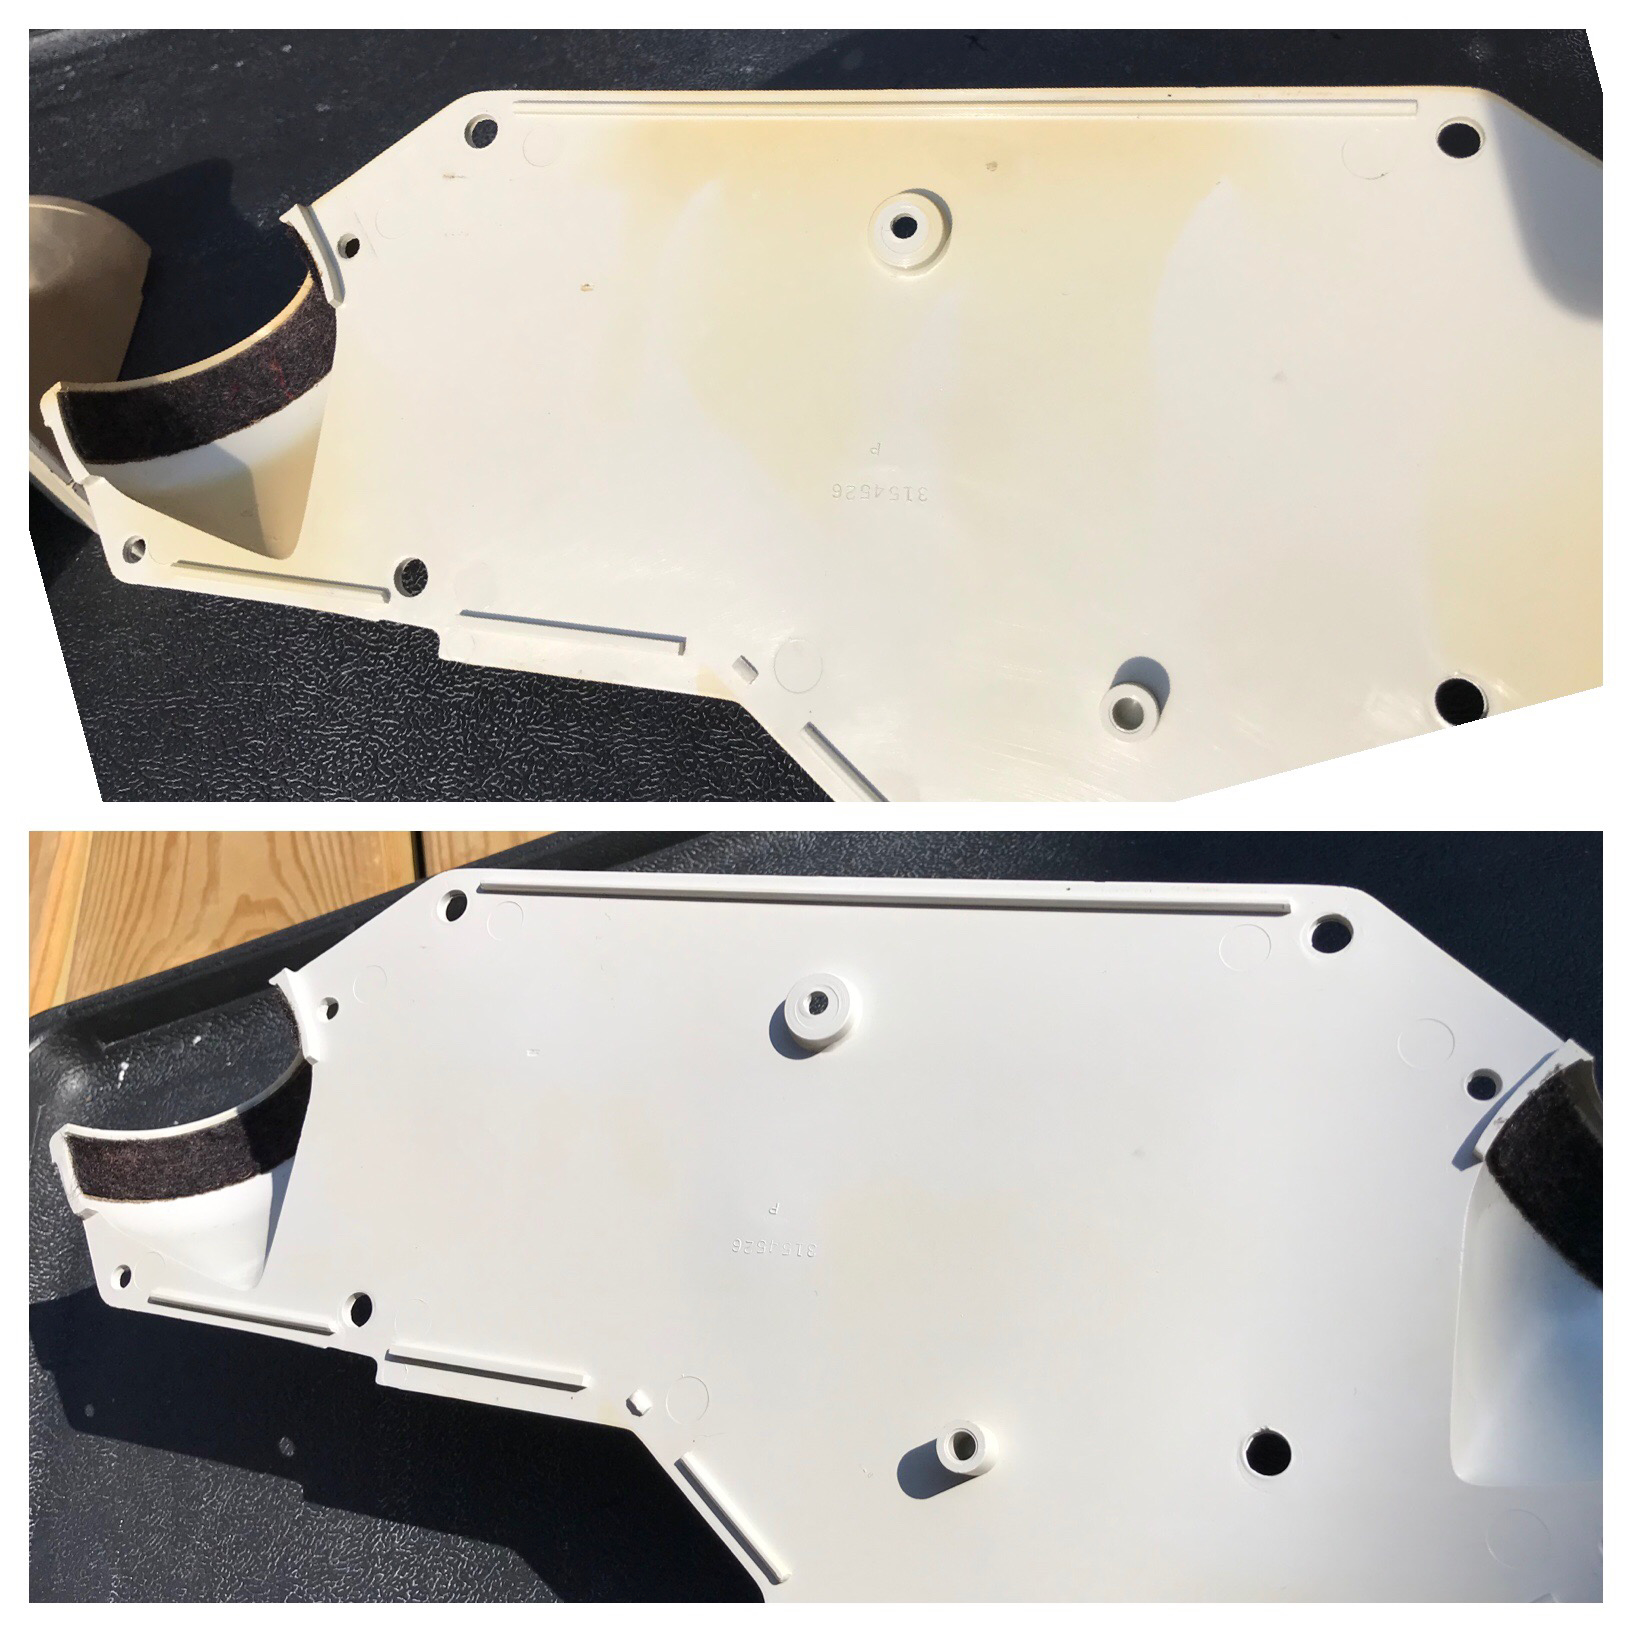
Clean the case halves with soap and water and dry completely. The case halves will be yellowed with age and exposure; this is readily evident by examining areas that were covered, such as the inside of the case or the areas covered by the bowties and control shaft nuts:


To restore the color of the plastic, we will use a technique developed by the antique computer hobby called “Retro-Brite”. This involves coating the plastic with a 40% Hydrogen Peroxide Gel and exposing it to intense Ultraviolet (UV) light. The combination of peroxide and UV will bleach out the yellow pigment and restore the plastic to its original color. It should be noted that the plastic may eventually yellow again with age and exposure to UV, but this will not happen quickly and can be minimized by keeping the plastic out of direct sun exposure.
Begin by purchasing some 40% Hydrogen Peroxide Hair Gel. The product pictured here is available from Amazon or various Hair salons. It is preferred to use a gel over a solution as it will remain on the plastic better. You will also need some gloves, plastic wrap, brush, and a plastic tray (tray is to protect your deck or patio). Most important, you need a nice sunny day – preferable summer sun, as it has the most intense UV rays. I also like to use a small bowl to hold the gel, but you could also just pour it directly from the bottle.

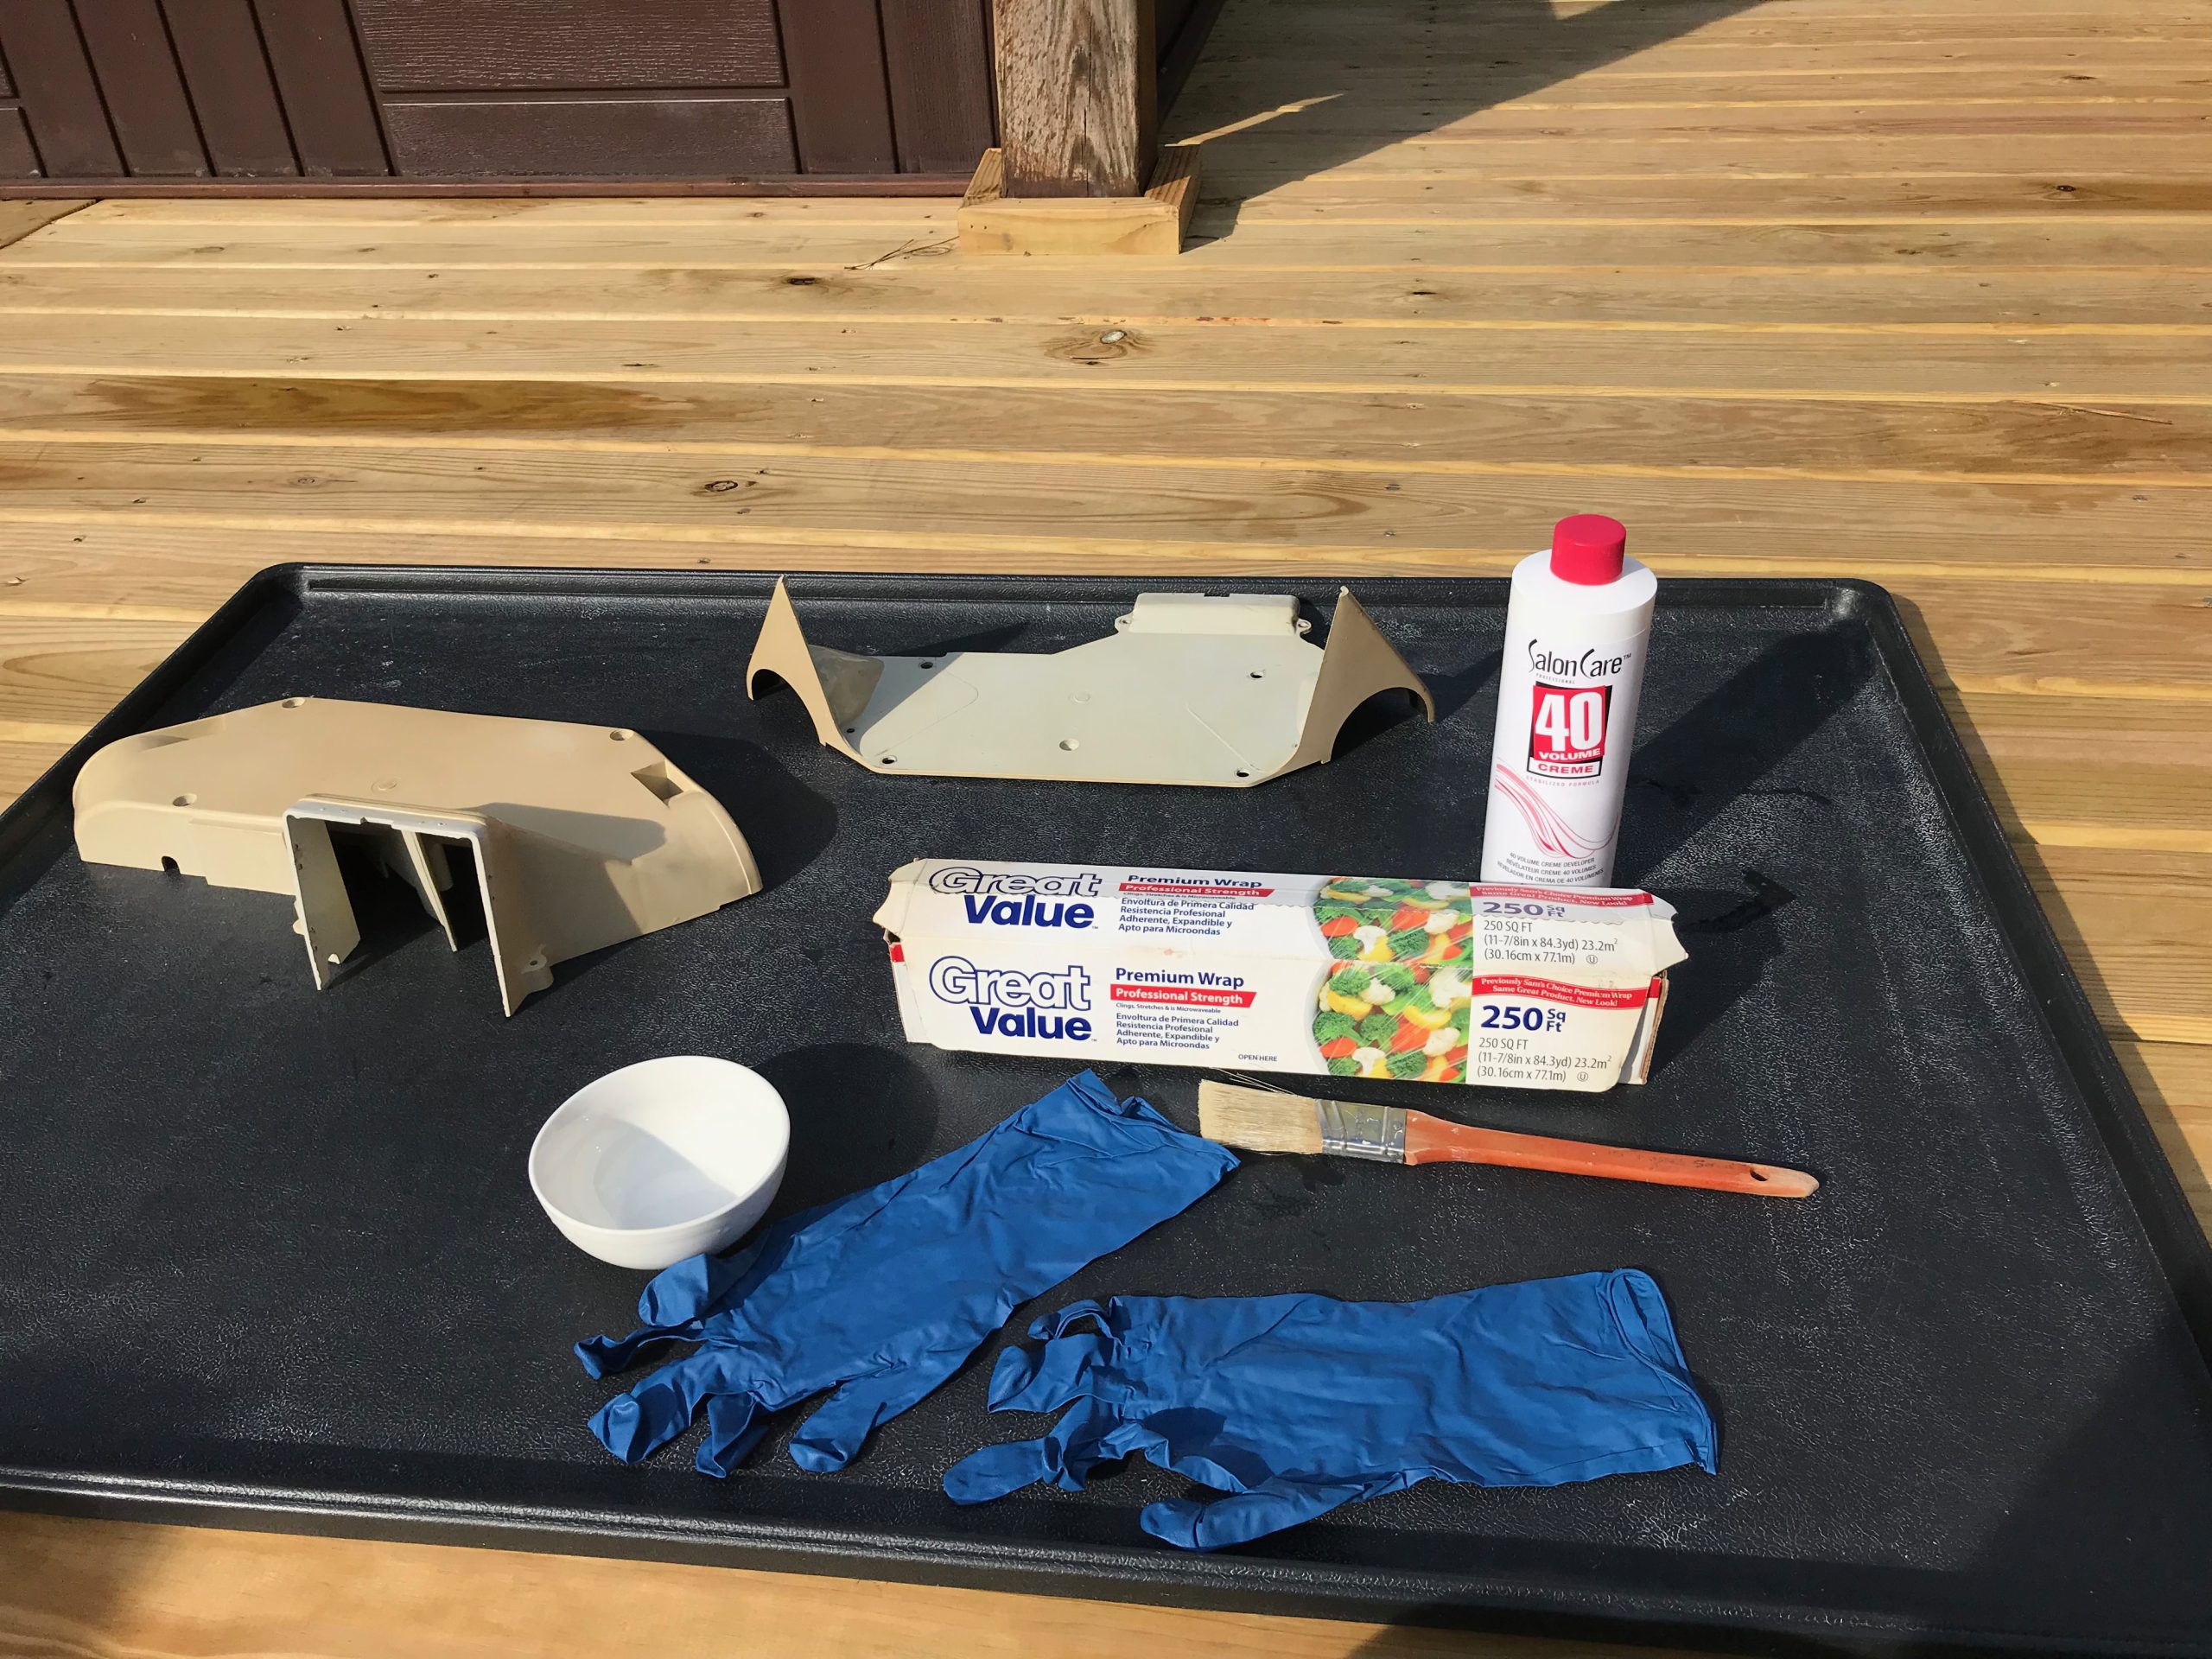
Using gloves to protect your hands, brush the H2O2 Gel over both sides of each case half – use liberal amounts to ensure adequate coverage. Now wrap each half in plastic wrap – this is to reduce evaporation of the gel while sitting in the hot sun. Allow the wrapped pieces to sit in the (preferably mid-day) sun for 30-60 minutes, checking occasionally. When it appears that the plastic has lightened sufficiently, turn the part over and repeat on the other side. Depending on the direction of the sunlight, you may have to rotate the parts more than once.


Remove the plastic, rinse and dry the part. Inspect for uneven lightening, streaks, etc. and, if found, repeat the process.
When finished, you should now notice the plastic is almost the same color as the originally protected areas

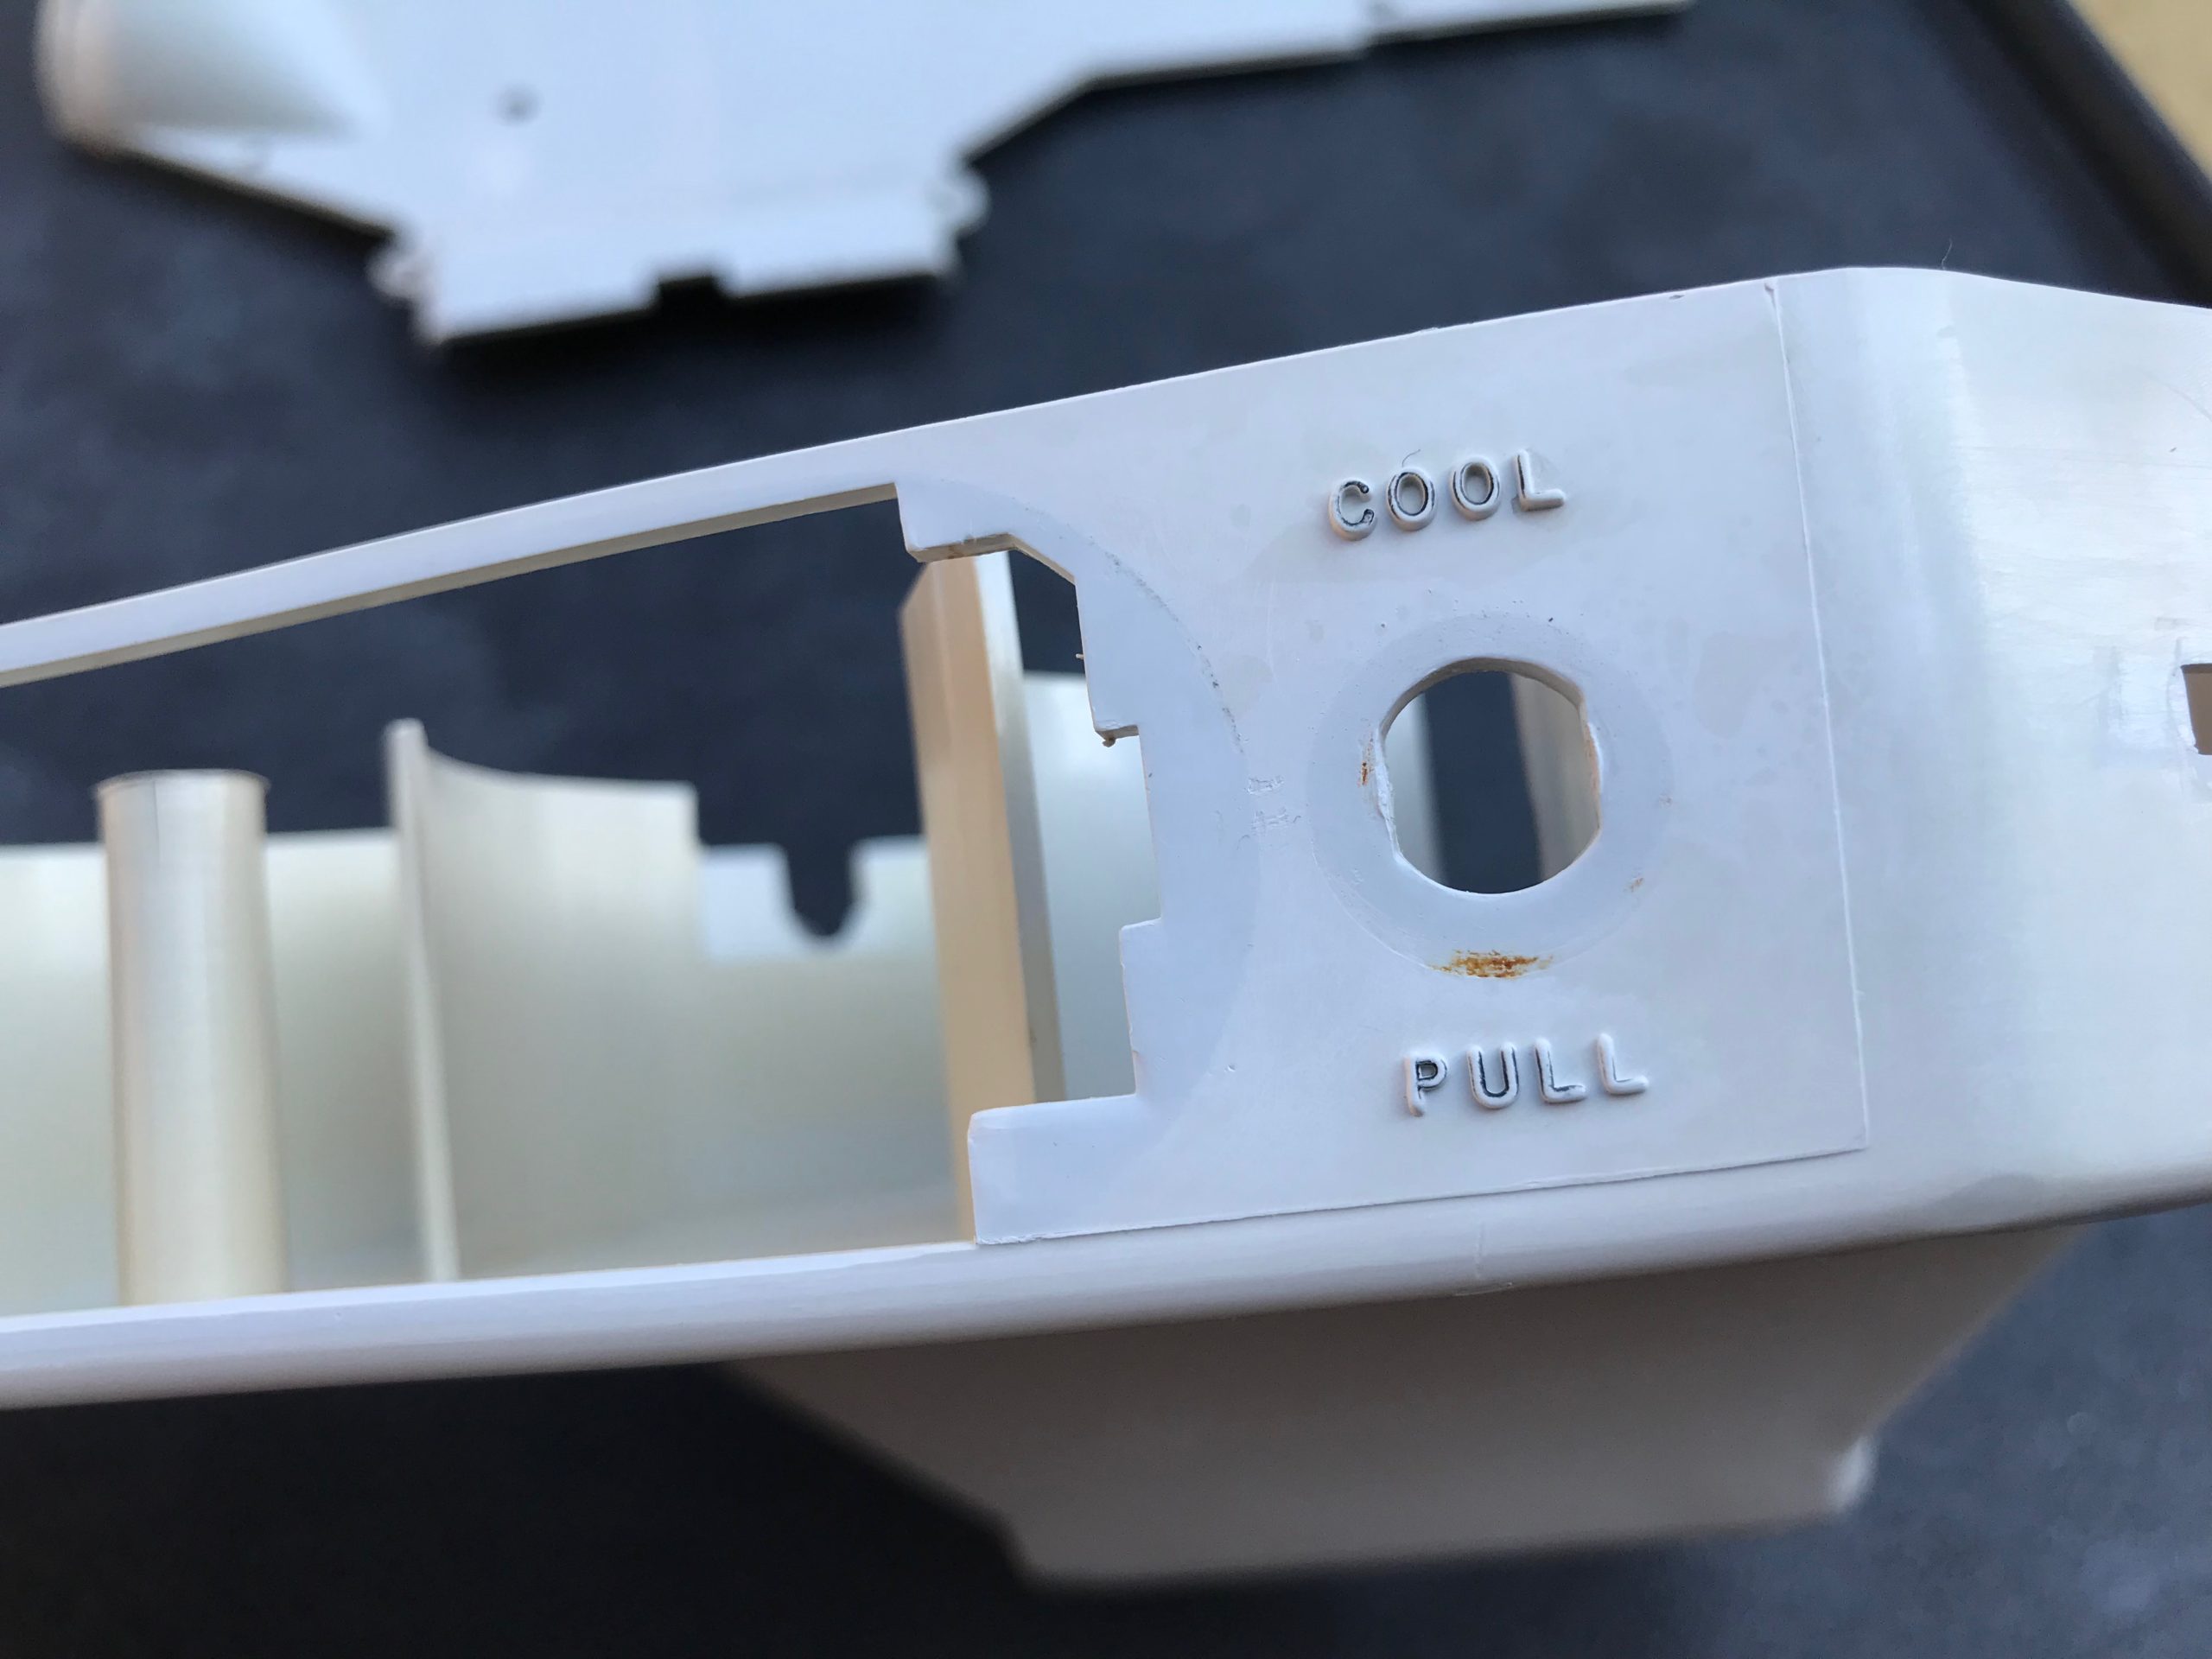
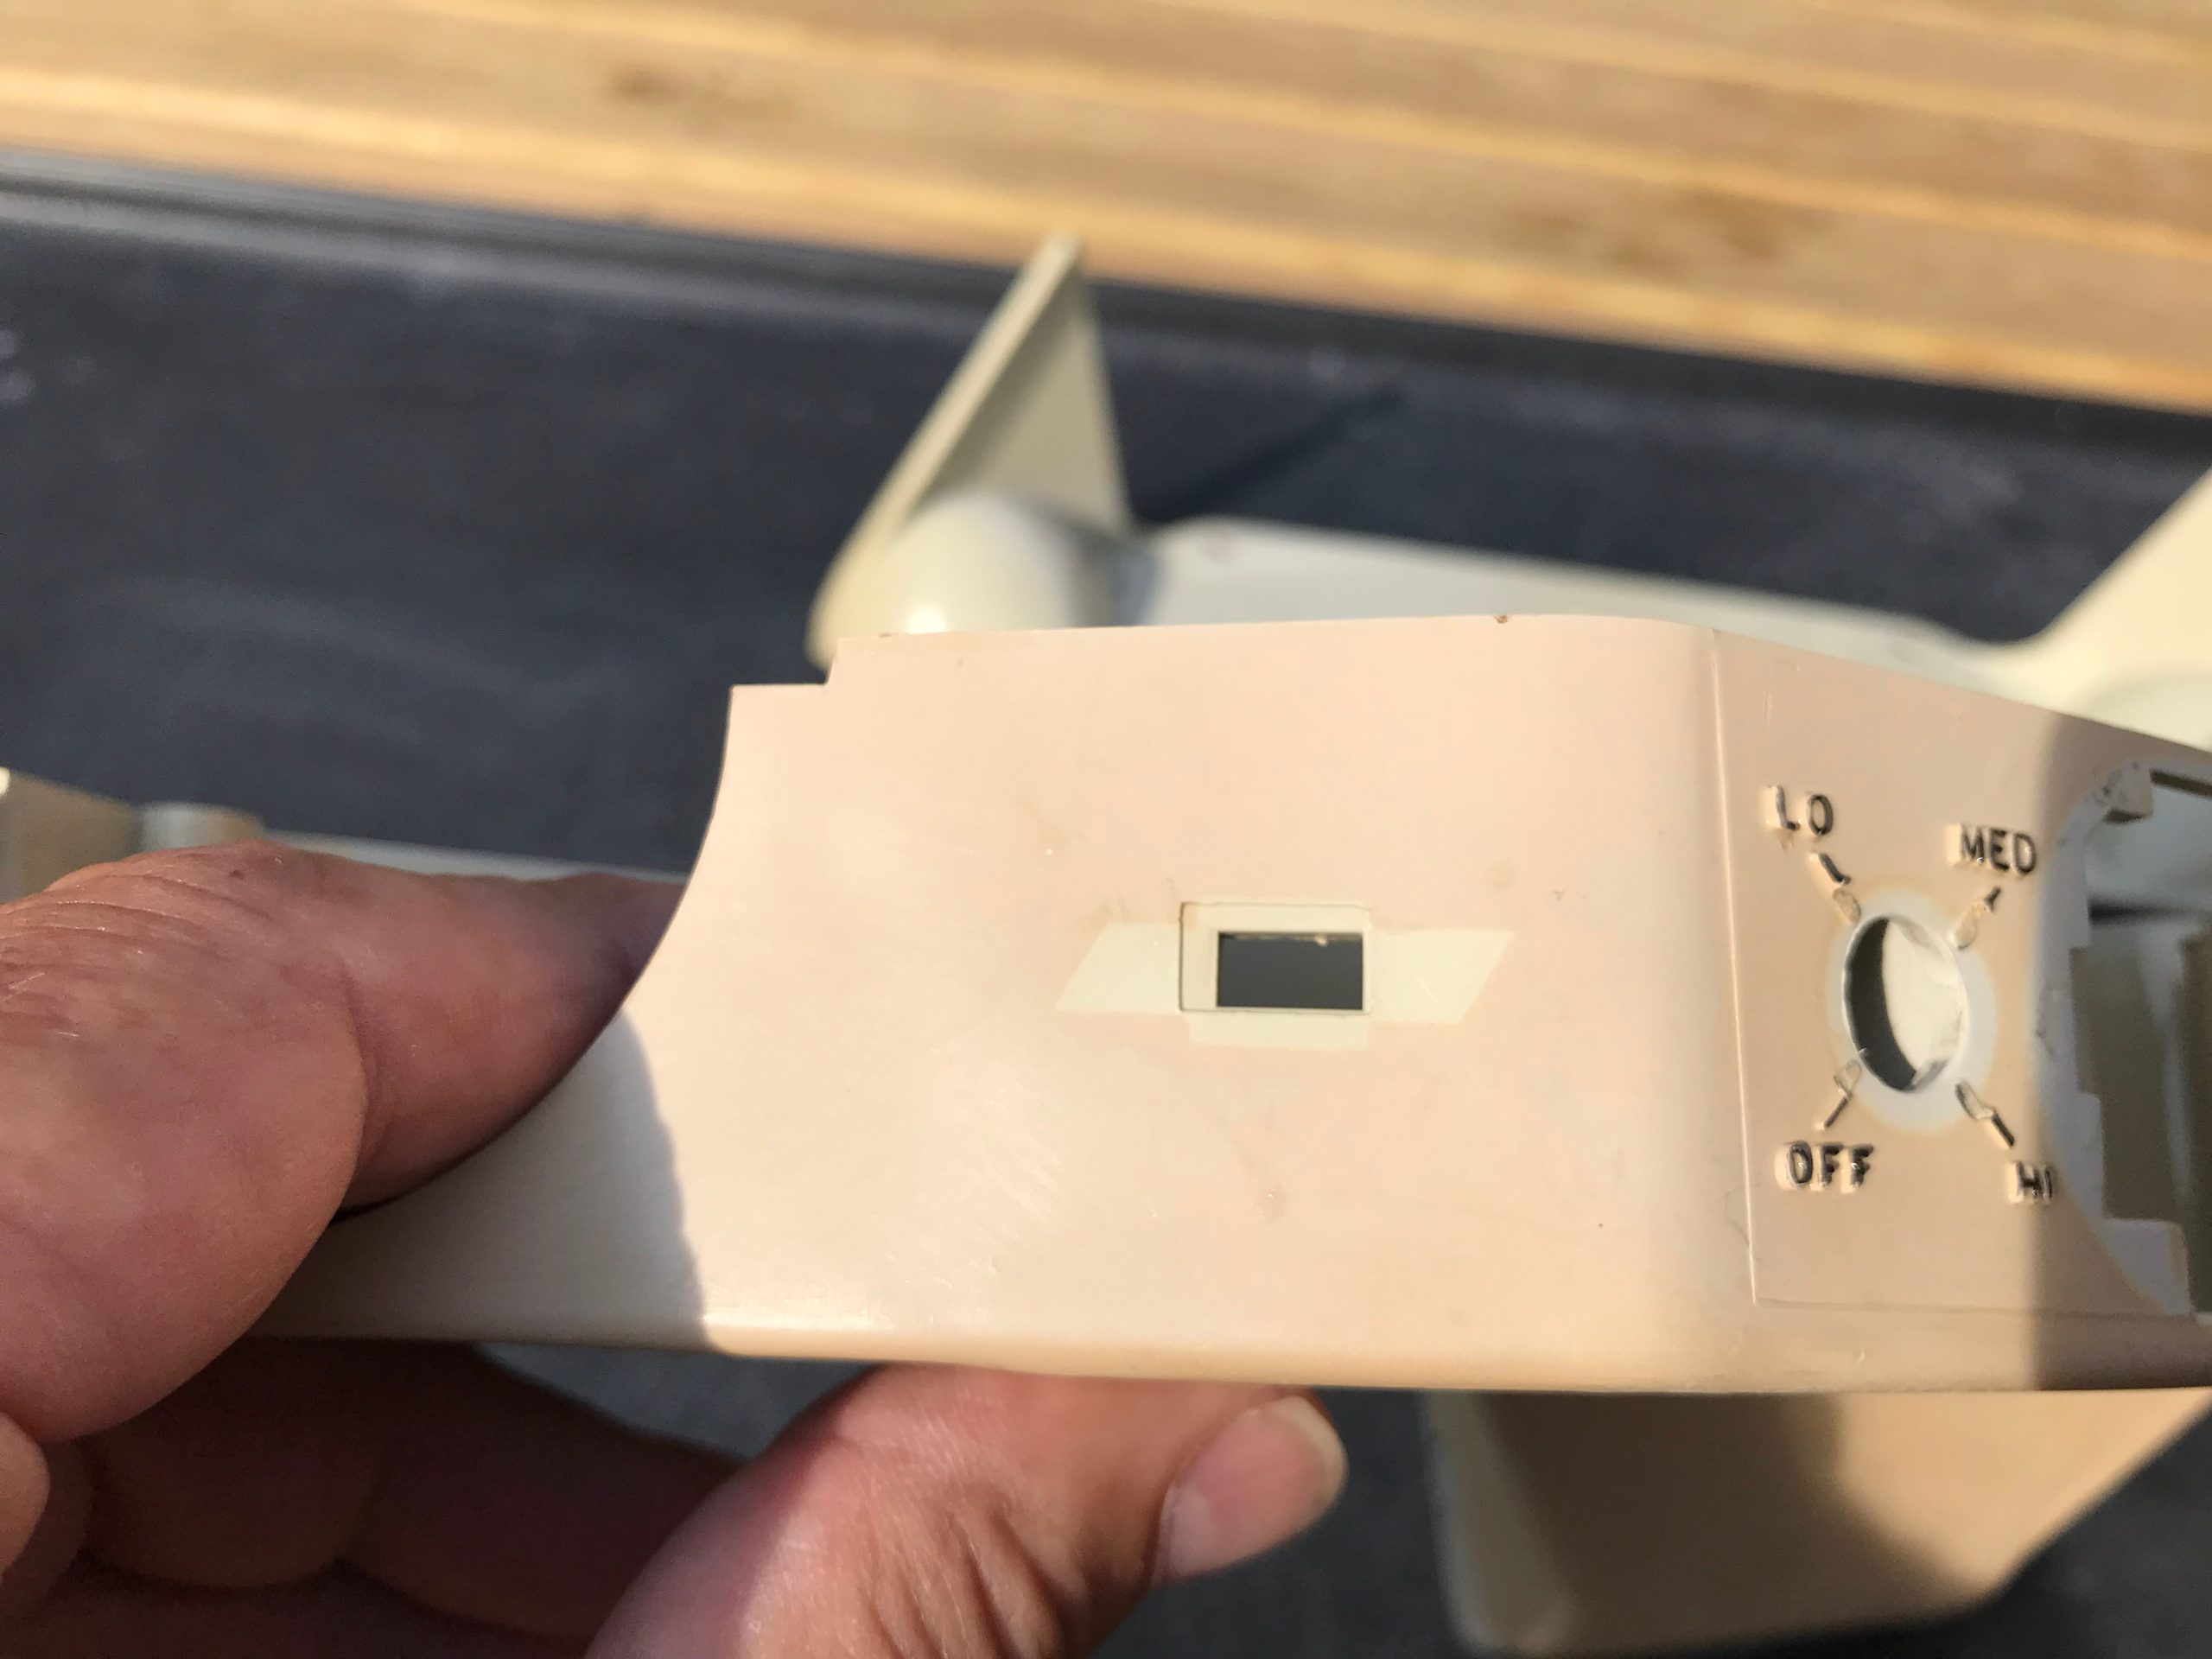
Use a black paint pen or black permanent marker to carefully touch up the raised letters and markings around the control shaft holes.
Reassembly
Glue the felt strips removed previously back onto their original position in the upper and lower cases, then reassemble the case, reversing the removal instructions above. To secure the inlet rubber seal, you can use wire or new staples, as you prefer.
Before and After photos
/


Final Result
Here is the completely reassembled unit, post restoration
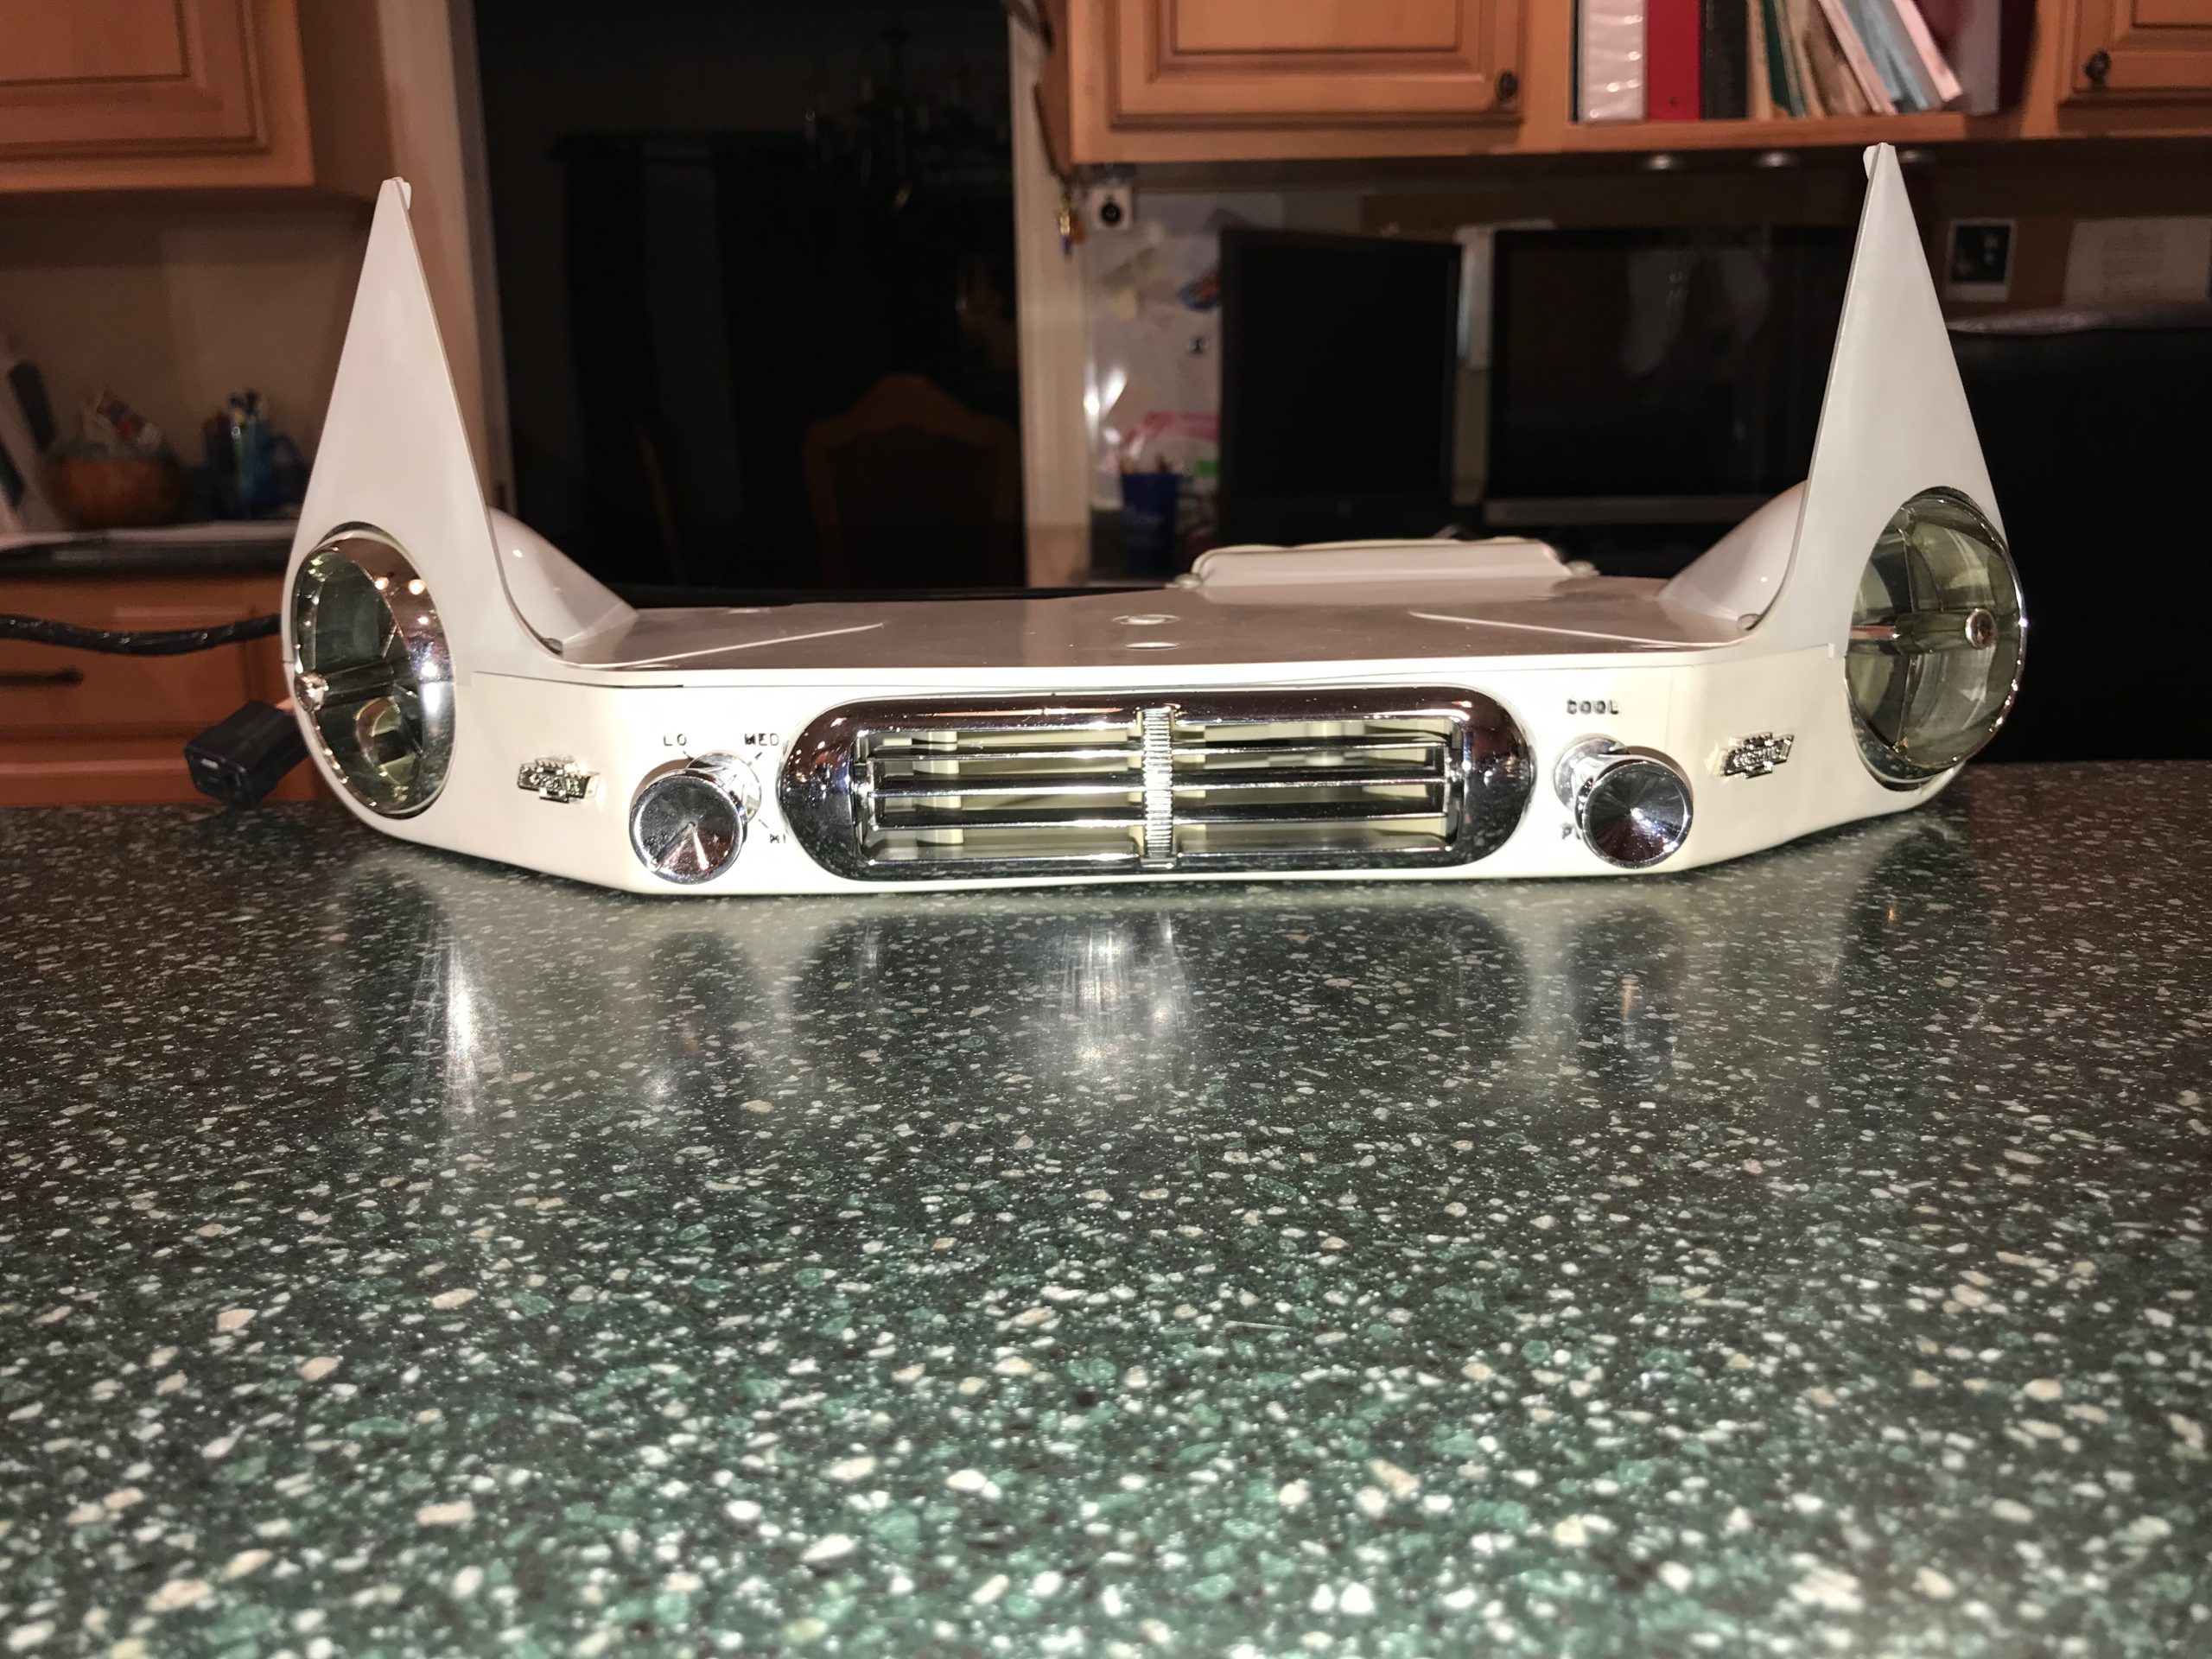


Installed in Car
Shown here installed in the John Glenn Corvair
